Category Archives: Sump pit maintenance

How to Get Rid of Sump Pump Odor for Good!

Are you tired of that unpleasant odor coming from your sump pump? Don’t worry, because we’ve got the solution for you! In this article, we’ll show you exactly how to get rid of sump pump odor for good. Whether you’re dealing with a musty smell or a foul sewage odor, our step-by-step guide will help you eliminate it and create a fresh and odor-free environment in your basement.

We understand how frustrating it can be when your sump pump starts emitting unpleasant smells. Not only does it make your basement uncomfortable, but it can also indicate a deeper issue with your sump pump system. That’s why it’s crucial to address the odor problem as soon as possible.

Using our expert tips and proven methods, you’ll be able to identify the cause of the odor and take the necessary steps to eliminate it. From cleaning and disinfecting your sump pump to preventing future odors, we’ve got you covered. Say goodbye to that unpleasant smell and hello to a fresh and clean basement!

Remember, a well-functioning sump pump should not emit any odor. So, let’s dive in and banish that sump pump odor once and for all!

Understanding the causes of sump pump odor

To effectively tackle sump pump odor, it’s important to understand its underlying causes. There can be several reasons why your sump pump is emitting unpleasant smells. One common cause is the presence of stagnant water in the sump pit. When water sits for an extended period, it can develop a musty odor. Another cause could be a faulty or improperly installed sump pump, which can lead to sewage odors.

Additionally, mold and mildew growth can contribute to sump pump odor. These fungi thrive in damp environments and can release a pungent smell. Finally, if your sump pump is constantly running, it may not have enough time to dry out, leading to the growth of bacteria that produce foul odors.

The importance of addressing sump pump odor

Ignoring sump pump odor can have serious consequences. Not only does it make your basement an unpleasant space to be in, but it can also indicate potential issues with your sump pump system. A well-functioning sump pump should not emit any odor, so if you notice a persistent smell, it’s crucial to take action.

Sump pump odor can be a sign of water damage, mold growth, or even a malfunctioning sump pump. These issues can lead to costly repairs and potential health hazards if left unaddressed. By tackling the odor problem early on, you can prevent further damage and ensure the longevity of your sump pump system.

Common DIY methods to eliminate sump pump odor

If you’re looking to tackle sump pump odor on your own, there are several DIY methods you can try. The first step is to inspect and clean the sump pit. Remove any debris, dirt, or standing water from the pit using a shop vacuum or a bucket. It’s important to wear protective gloves and a mask to avoid contact with potentially harmful substances.

Once the pit is clean, you can create a homemade cleaning solution using a mixture of water and bleach. Use a scrub brush to thoroughly clean the pit, ensuring you reach all corners and crevices. After scrubbing, rinse the pit with clean water to remove any remaining bleach residue.

Another effective DIY method is to use vinegar to eliminate sump pump odor. Vinegar is a natural disinfectant that can help neutralize odors. Mix equal parts vinegar and water and pour it into the sump pit. Allow the mixture to sit for a few hours before flushing it out with clean water.

Using natural remedies to get rid of sump pump odor

If you prefer to use natural remedies, there are several options available to you. Baking soda is a versatile and affordable natural deodorizer. Sprinkle baking soda directly into the sump pit to absorb odors. Leave it overnight and then vacuum or sweep it out the next day.

Charcoal is another effective natural remedy for sump pump odor. Place a few pieces of activated charcoal in a mesh bag and hang it near the sump pit. Charcoal has excellent odor-absorbing properties and can help eliminate the unpleasant smell.

You can also use essential oils to mask sump pump odor. Add a few drops of your favorite essential oil, such as lavender or lemon, to a cotton ball and place it near the sump pit. The pleasant scent of the essential oil will help mask any lingering odors.

Professional solutions for sump pump odor removal

If the DIY methods mentioned above don’t completely eliminate the sump pump odor, it may be time to consider professional solutions. In some cases, a faulty or outdated sump pump may need to be replaced. Additionally, for an effective and eco-friendly solution, consider using Brofloat, a floating citrus-based degreaser and deodorizer. Brofloat is designed to break down and eliminate unpleasant odors in sump pump systems. 
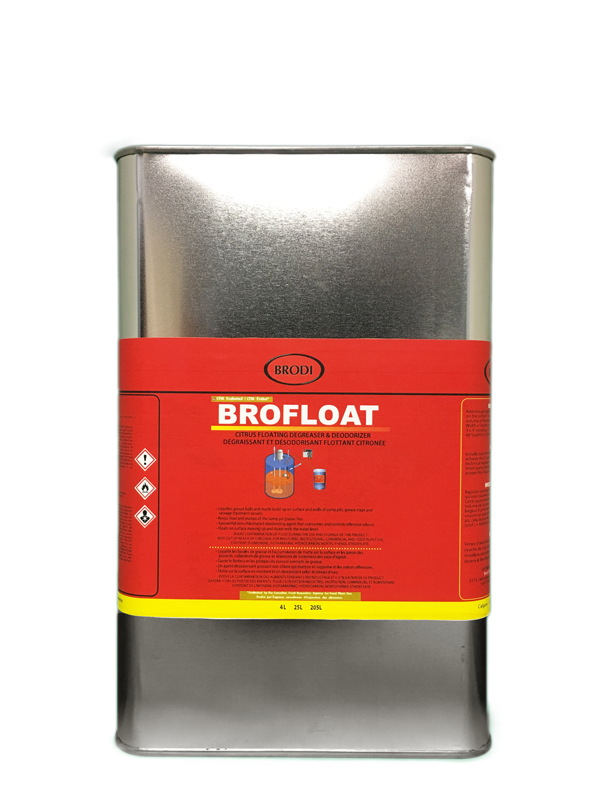
BroFloat

You can learn more about this product and its benefits by clicking here

Brofloat not only neutralizes odors but also helps in maintaining a clean and efficient sump pump system. Its citrus-based formula is environmentally friendly and safe for use in residential spaces. By incorporating Brofloat into your sump pump maintenance routine, you can enjoy a fresher and more pleasant basement environment, ensuring the longevity and effectiveness of your sump pump system.

Preventing sump pump odor in the future

Once you’ve successfully eliminated the sump pump odor, it’s important to take preventive measures to ensure it doesn’t return. Regular maintenance is key to keeping your sump pump system odor-free. Here are a few tips to help you prevent sump pump odor in the future:

1. Check your sump pump regularly for any signs of malfunction or damage. Look for leaks, strange noises, or excessive vibration.

2. Clean the sump pit and remove any debris or standing water on a regular basis.

3. Install a sump pump cover to prevent odors from escaping and to keep out debris and pests.

4. Consider installing a backup sump pump system to ensure continuous operation even during power outages.

5. Keep the surrounding area of the sump pump clean and free from clutter to promote proper air circulation.

By following these preventive measures, you can maintain a fresh and odor-free basement and avoid any future issues with your sump pump system.

Maintaining and cleaning your sump pump to prevent odor

Regular maintenance and cleaning are essential to prevent sump pump odor. Here are some steps you can take to maintain and clean your sump pump:

1. Test your sump pump regularly by pouring water into the pit and ensuring it activates properly.

2. Clean the sump pit at least once a year to remove any debris or sediment that may have accumulated.

3. Inspect the discharge pipe and make sure it is clear of any obstructions or clogs.

4. Check the float switch to ensure it is functioning correctly. This switch is responsible for activating the sump pump when the water level rises.

5. Consider installing a sump pump alarm that will alert you if the water level in the pit becomes too high.

By following these maintenance and cleaning tips, you can extend the lifespan of your sump pump and prevent any unpleasant odors from developing.

Signs of a malfunctioning sump pump that may contribute to odor

Sump pump odor can be an indication of a malfunctioning sump pump. It’s essential to be aware of the signs that your sump pump may not be functioning properly. Here are a few signs to watch out for:

1. Excessive noise: If your sump pump is making loud or unusual noises, it may be a sign of a mechanical issue.

2. Constant running: A sump pump that is constantly running even when there is no significant water accumulation may indicate a problem with the float switch or the pump itself.

3. Inconsistent operation: If your sump pump fails to activate when water levels rise or if it turns on and off frequently, it may be a sign of a malfunctioning float switch.

4. Visible leaks: Any signs of water leakage around the sump pump or the discharge pipe could be an indication of a faulty seal or a cracked pump housing.

If you notice any of these signs, it’s important to address the issue promptly to prevent further damage and potential odor problems.

Frequently asked questions about sump pump odor

1. Can a sump pump emit a foul sewage smell?

Yes, a foul sewage smell can indicate a problem with your sump pump system, such as a malfunctioning check valve or a broken sewer line.

2. How often should I clean my sump pump?

It’s recommended to clean your sump pump at least once a year to prevent odors and ensure optimal performance.

3. Can mold and mildew cause sump pump odor?

Yes, mold and mildew growth can contribute to sump pump odor. It’s important to address any signs of mold or mildew promptly.

4. Why is my sump pump constantly running?

A sump pump that is constantly running may indicate a problem with the float switch or a high water table in your area.

5. How long does a sump pump typically last?

The lifespan of a sump pump can vary depending on various factors, but on average, a sump pump can last anywhere from 7 to 10 years.

Conclusion: Enjoying a fresh and odor-free basement with a properly functioning sump pump

In conclusion, sump pump odor is a common issue that can be easily addressed with the right knowledge and tools. By understanding the causes of sump pump odor and taking preventive measures, you can enjoy a fresh and odor-free basement.

Remember, regular maintenance, cleaning, and inspection are essential to ensure your sump pump operates efficiently and keeps your basement dry and odor-free. If DIY methods don’t completely eliminate the odor, don’t hesitate to seek professional help to address any underlying issues with your sump pump system.

Say goodbye to that unpleasant smell and hello to a fresh and clean basement! With our expert tips and proven methods, you can banish sump pump odor for good and create a comfortable living space that you and your family can enjoy.

The Ultimate Guide to Cleaning Grease Traps: Best Practices and Tips

Are you struggling with a stubborn grease trap? Fret not, because we have got you covered with the ultimate guide to cleaning grease traps. Grease traps can easily become a messy and smelly headache if not maintained properly. But fear not, with our best practices and tips, you’ll have that grease trap sparkling clean in no time.

Cleaning grease traps is no easy task, but it is essential for the smooth running of your kitchen or restaurant. In this comprehensive guide, we will walk you through everything you need to know, from the importance of regular cleaning to the step-by-step process of cleaning your grease trap effectively.

We’ll provide you with expert tips on selecting the right cleaning products, tools, and techniques to tackle even the toughest grease buildup. You’ll also learn how to minimize odors and prevent clogs, ensuring your grease trap stays clean and odor-free for longer.

So, whether you’re a restaurant owner or a homeowner, this guide will equip you with the knowledge and skills you need to master cleaning grease traps. Say goodbye to grease and hello to a clean and functional kitchen!

Signs that your grease trap needs cleaning

Properly cleaning grease traps is crucial for several reasons. First and foremost, it helps prevent clogs in your plumbing system. When grease accumulates in the trap and solidifies, it can cause blockages that lead to backups and costly repairs. Regular cleaning ensures that the trap remains clear and allows for efficient flow.

Another important reason to clean grease traps is to prevent foul odors. Grease traps can emit unpleasant smells when they are not cleaned regularly. These odors can permeate your kitchen or restaurant, affecting the dining experience and driving away customers. By cleaning your grease trap, you can maintain a fresh and inviting environment.

Additionally, cleaning grease traps is essential for compliance with health and safety regulations. Many local authorities require businesses, especially those in the food service industry, to regularly clean and maintain their grease traps. Failure to do so can result in fines and potential closure of your establishment.

Best practices for cleaning grease traps

Knowing when to clean your grease trap is crucial to prevent issues before they escalate. Here are some common signs that indicate your grease trap needs cleaning:

1. Slow draining sinks: If you notice that your sinks are draining slowly, it could be a sign that your grease trap is clogged. As grease builds up, it restricts the flow of water, causing drainage problems.

2. Foul odors: Unpleasant smells emanating from your kitchen or restaurant are a clear indication that your grease trap needs attention. These odors are a result of the accumulation of grease and other food debris.

3. Grease buildup on surfaces: If you notice a greasy film on your sink, walls, or floors, it’s a sign that your grease trap is not functioning properly. The grease is finding its way out of the trap and causing a mess.

4. High water levels in the trap: When you inspect your grease trap, if you find that the water level is abnormally high, it indicates that the trap is full and needs cleaning. The high water level prevents the trap from effectively capturing grease and solids.

Tools and equipment needed for grease trap cleaning

Cleaning a grease trap requires careful attention to detail and adherence to best practices. Follow these guidelines to ensure effective and efficient cleaning:

  1. Wear protective gear: Before you start cleaning, make sure to wear gloves, goggles, and protective clothing. Grease traps can contain harmful bacteria and chemicals, so it’s important to protect yourself.
  2. Gather the necessary tools and materials: You’ll need a bucket, scraper, brush, and a grease trap cleaning solution. It’s important to use a cleaning solution specifically designed for grease traps, as household cleaners may not be effective.
  3. Add CGTC 7150 to your cleaning arsenal: Incorporate CGTC 7150, a specialized grease trap cleaning solution, into your toolkit. CGTC 7150 is known for its powerful formula that effectively breaks down grease and ensures a thorough cleaning process. Follow the manufacturer’s instructions for the proper use of CGTC 7150.
  4. Disconnect the trap: Start by disconnecting the grease trap from the plumbing system. This can usually be done by removing a few bolts or screws. Be sure to place a bucket underneath to catch any residual water or grease.
  5. Remove the lid and scrape off the solidified grease: Carefully remove the grease trap lid and use a scraper to eliminate any solidified grease or debris. Be thorough in your scraping to ensure a clean trap.
  6. Scrub the sides and bottom of the trap: Use a brush or scrubber to clean the sides and bottom of the trap. Pay special attention to areas where grease tends to accumulate. Utilize the cleaning solution, including CGTC 7150, to help break down and remove stubborn grease.
  7. Rinse and reassemble the trap: Once you’ve thoroughly cleaned the trap, rinse it with hot water to remove any remaining residue. Reassemble the trap, ensuring all connections are secure.
  8. Properly dispose of the grease and waste: It’s important to dispose of the grease and waste properly. Check local regulations for guidelines on disposal. Never pour grease down the drain, as it can cause clogs and environmental damage. Instead, follow approved methods for disposal by local regulations.

Step-by-step guide to cleaning a grease trap

To effectively clean a grease trap, you’ll need the following tools and equipment:

1. Gloves: Protect your hands from chemicals and bacteria with a pair of durable gloves.

2. Goggles: Safeguard your eyes from splashes and fumes by wearing protective goggles.

3. Scraper: Use a sturdy scraper to remove solidified grease and debris from the trap.

4. Brush or scrubber: A brush or scrubber with stiff bristles will help you clean the sides and bottom of the trap thoroughly.

5. Bucket: Place a bucket underneath the trap to catch any water or grease that may spill during the cleaning process.

6. Grease trap cleaning solution: Invest in a high-quality grease trap cleaning solution that is specifically designed to break down and remove grease buildup.

Tips for maintaining a clean grease trap

The frequency of cleaning your grease trap depends on various factors, including the size of your trap and the amount of grease generated. As a general guideline, it is recommended to clean your grease trap at least every three months. However, high-volume kitchens or restaurants may require more frequent cleaning, such as monthly or even weekly.

Regular inspection is key to determining when your grease trap needs cleaning. Look for signs of grease buildup, slow drainage, foul odors, or high water levels. If you notice any of these signs, it’s time to clean your grease trap.

Professional grease trap cleaning services

While regular maintenance and cleaning are essential, sometimes it’s best to leave the job to the professionals. Hiring a professional grease trap cleaning service can save you time, and effort, and ensure a thorough cleaning. These experts have the knowledge, experience, and equipment to handle even the toughest grease trap situations.

To ensure your grease trap stays clean and functional for longer, consider implementing these tips:

1. Implement a regular maintenance schedule: Create a schedule for cleaning your grease trap and stick to it. Regular cleaning prevents excessive grease buildup and keeps your trap operating smoothly.

2. Use eco-friendly cleaning products: Consider using eco-friendly and biodegradable cleaning products that are safe for the environment. This helps minimize the impact of your cleaning activities.

3. Train your staff: Educate your kitchen staff on the importance of proper waste disposal and grease trap maintenance. Encourage them to scrape food scraps into trash bins rather than washing them down the drain.

4. Install a grease trap alarm: Consider installing a grease trap alarm that alerts you when the trap is approaching its maximum capacity. This ensures timely cleaning and prevents overflow.

5. Regularly inspect and clean drain screens: Drain screens can catch solid debris and prevent them from entering the grease trap. Clean them regularly to maintain efficient flow and reduce the risk of clogs.

When choosing a professional service, make sure they are licensed, insured, and have a good reputation. Read reviews and ask for recommendations from other restaurant owners or homeowners who have used their services. A professional cleaning service will keep your grease trap in top shape, allowing you to focus on running your business or enjoying your home.

Conclusion

In conclusion, conquering the challenges posed by a stubborn grease trap is within your reach with our comprehensive guide to cleaning and maintaining these essential kitchen components. Grease traps, when neglected, can transform into messy and odorous headaches, leading to plumbing issues and potential business disruptions. However, armed with our expert advice and best practices, you’ll transform your grease trap from a source of concern to a sparkling, efficiently functioning asset in no time.

We’ve covered everything from the critical signs indicating the need for cleaning, the importance of regular maintenance to prevent clogs and foul odors, to a step-by-step guide on how to effectively clean your grease trap. Remember, a clean grease trap not only ensures a smooth kitchen operation but also contributes to a fresh and inviting environment for your customers.

Our tips on selecting the right cleaning products, tools, and techniques, including the powerful CGTC 7150 solution, will equip both restaurant owners and homeowners with the knowledge and skills needed to master grease trap cleaning. We’ve emphasized the importance of proper disposal methods to adhere to environmental regulations and maintain a responsible cleaning routine.

For those who prefer a hands-off approach or require a more thorough cleaning, we’ve introduced the option of professional grease trap cleaning services. These experts possess the knowledge, experience, and equipment to tackle even the toughest grease trap situations, providing you with peace of mind.

In the journey toward a clean and functional kitchen, implementing our tips for maintaining a clean grease trap becomes crucial. From eco-friendly cleaning products to regular staff training and the installation of grease trap alarms, these practices contribute to a sustained, efficient grease trap operation.

So, whether you’re a seasoned restaurant owner or a diligent homeowner, follow our guide, implement the suggested practices, and bid farewell to grease-related woes. Say goodbye to clogs, foul odors, and potential regulatory issues. Embrace a clean and functional kitchen that enhances both the operational efficiency of your business and the comfort of your home. Here’s to a grease-free future!

How to Eliminate Drain Odors and Sewer Smells

Preventing sewer smell, sanitary sump pit

So you’ve got sewer smells emanating from somewhere in your business’ location. These awful smells, like many others, are bad for business, especially if you’re in the restaurant industry. A bad smelling restaurant can mean that customers will lose their appetites and by extension, you’ll lose business. However, awful smells are bad for any business in general, so are there any ways we can eliminate and possibly prevent those odors? Yes, there are, but let’s explore why we get those odors first.

Continue reading How to Eliminate Drain Odors and Sewer Smells

Eliminating grease and sewer accumulations built up in sanitary sump pits

Sump pit degreasing and deodorizing before and afterSo it looks like you’ve got a buildup of grease in your sanitary sump pit system, causing awful odors and maybe even overflowing. But what can you do? Call in a company to clean it out? Sure you could do that once, but do you have the capital to call in a company as frequently as your sanitary sump pit stinks up? Or is there another way to prolong the time in between these cleanouts?

Continue reading Eliminating grease and sewer accumulations built up in sanitary sump pits