Monthly Archives: November 2023

How to Get Rid of a Smelly Drain in Your Kitchen Sink

Have you ever noticed a foul smell coming from your kitchen sink? If so, you are not alone. Many people struggle with smelly drains that can ruin the ambiance of their kitchen and make cooking and cleaning unpleasant. A smelly drain can also pose health risks, as it can attract pests, spread germs, and cause allergies or infections. Therefore, it is important to address the issue as soon as possible and prevent it from recurring.

In this blog, we will help you understand the causes of a smelly drain and provide you with some effective solutions to get rid of it. We will also share some preventive measures to keep your kitchen sink fresh and inviting. By following these tips, you can enjoy a clean and odor-free kitchen that will make your life easier and happier.

Understanding the Causes of a Smelly Drain in Kitchen Sink

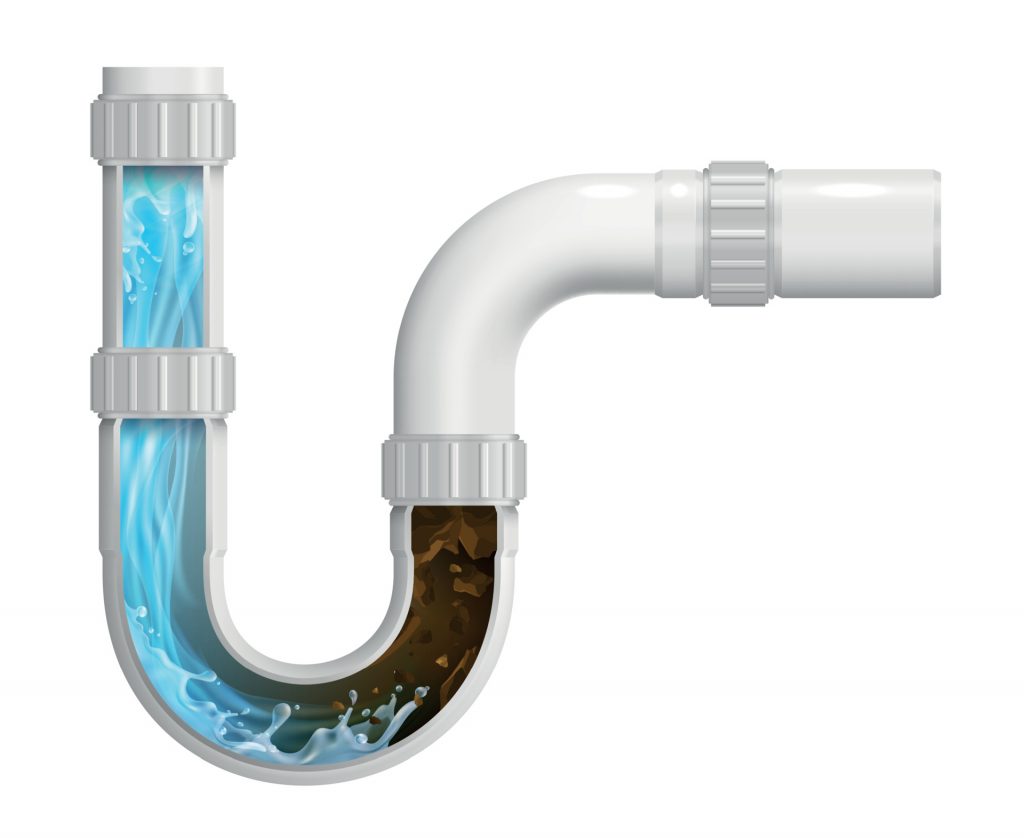
A smelly drain is not only a nuisance, but also a potential health hazard. A smelly drain can indicate that there is something wrong with your plumbing system, such as a clog, a leak, or a sewer backup. These problems can lead to water damage, mold growth, and structural issues in your home. They can also cause wastewater to overflow into your sink, contaminating your dishes, utensils, and food. This can expose you and your family to harmful bacteria, viruses, parasites, and chemicals that can cause diseases such as diarrhea, typhoid, hepatitis, and cholera.

Moreover, a smelly drain can affect your mood and well-being. A smelly drain can create a foul and unpleasant atmosphere in your kitchen, which can make you feel disgusted, stressed, or depressed. A smelly drain can also interfere with your sense of smell and taste, affecting your appetite and enjoyment of food. A smelly drain can also lower your self-esteem and confidence, as it can make you feel embarrassed or ashamed of your home. A smelly drain can also deter your guests from visiting your home, affecting your social life and relationships.

Therefore, it is important to address the issue of a smelly drain as soon as you notice it and prevent it from worsening. By doing so, you can protect your health, your home, and your happiness.

There are several possible causes of a smelly drain in your kitchen sink, such as:

Accumulated Food Residue

Leftover food particles can accumulate in the drain and cause foul smells.

Grease and Fat Buildup:

The kitchen sink is often a landing spot for greasy dishes. Over time, grease and fat deposits can accumulate in the drain, creating a breeding ground for bacteria and contributing to foul smells.

Bacterial Growth:

The damp and dark environment inside the drain is an ideal breeding ground for bacteria. The decomposition of organic matter in the drain can lead to the production of sulfurous compounds, causing the characteristic foul odor.

Step-by-Step Solutions for a Fresh-Smelling Kitchen Sink

Now that you know the causes of a smelly drain, let’s look at some of the solutions to get rid of it. Here are some of the methods that you can try at home using simple and natural ingredients that you may already have in your kitchen.

Hot Water Flush and Baking Soda-Vinegar Treatment

One of the simplest and most effective ways to get rid of a smelly drain in the kitchen sink is to use a combination of hot water, baking soda, and vinegar. This method can help remove grease, food particles, and bacteria that cause bad odors in your drain. Here is the proper procedure to follow:

•  Boil a large pot of water and pour it down the drain. This can help loosen and flush away any clogs or debris in the pipe.

•  Sprinkle half a cup of baking soda into the drain and let it sit for a few minutes. Baking soda is a natural deodorizer that can absorb and neutralize odors.

•  Pour one cup of white vinegar into the drain and cover it with a drain plug or a wet cloth. Vinegar is a natural acid that can react with baking soda and create a fizzing action that can dislodge and dissolve any remaining gunk in the drain.

•  Wait for 15 to 20 minutes and then pour another pot of boiling water down the drain. This can help rinse and clear the drain of any residue or bubbles.

You can repeat this treatment once a month or as needed to keep your drain fresh and clean. However, if you have a garbage disposal in your sink, you may want to avoid using vinegar as it can corrode the metal parts over time. Instead, you can use lemon juice or citric acid as a substitute.

Duration and Frequency

This treatment can take about 30 to 40 minutes to complete, depending on how much water you need to boil and how long you wait for the reaction to take place. You can do this treatment once a month or as needed, depending on how often you use your sink and how smelly your drain is. You can also do this treatment as a preventive measure to prevent odors from building up in your drain.

Citrus Power

Another way to get rid of the smelly drain in your kitchen sink is to use the power of citrus fruits, such as lemons, oranges, grapefruits, or limes. Citrus fruits contain citric acid, which can help break down grease and fat in your pipe. They also contain natural oils, which can help freshen up your drain with a pleasant and refreshing scent. Here are some effective ways to use citrus fruits for your drain:

•  Cut a lemon or an orange in half and squeeze the juice into the drain. You can also rub the peel on the drain opening to release the oils. This can help clean and deodorize your drain with a citrusy smell.

•  Cut a grapefruit or a lime in half and sprinkle some salt on the flesh. Then, rub the salted fruit on the drain opening and inside the pipe. This can help scrub and disinfect your drain with a tangy smell.

•  Peel and chop some citrus fruits of your choice and put them in a blender. Add some water and blend until smooth. Then, pour the mixture into the drain and let it sit for a few minutes. This can help flush and sanitize your drain with a fruity smell.

You can use any citrus fruit that you like or have available for this method. You can also mix and match different fruits to create your own custom scent for your drain.

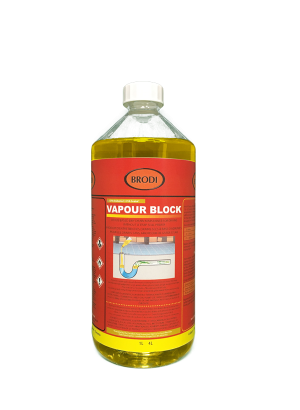
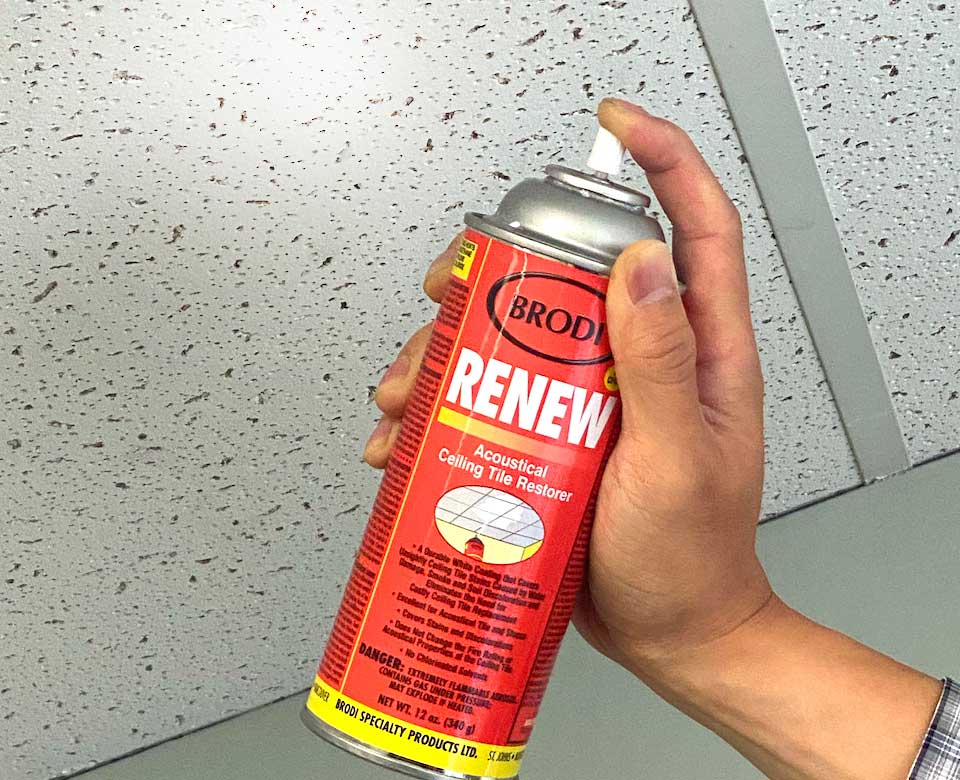
Deep Cleaning with Turbo Foam:

An easier method to get rid of the smelly drain in your kitchen sink is to use turbo foam, which is a foaming drain maintainer that can help dissolve and remove grease, fat, and food residue from your pipe. Turbo foam can also help eliminate bacteria and odors from your drain and prevent clogs and backups. Here is how to use turbo foam for your drain:

•  Shake the can well before use and remove the cap. Attach the nozzle to the can and insert it into the drain opening. Make sure the nozzle is firmly in place and pointing down the drain.

Turbo Foam

•  Press the button and release a generous amount of foam into the drain. The foam will expand and fill the pipe, reaching and cleaning the hard-to-reach areas. You will hear a hissing sound as the foam works its way down the drain.

•  Wait for 15 to 20 minutes and then flush the drain with hot water. The foam will dissolve and wash away any grease, fat, food, and bacteria from the pipe, leaving it clean and odor-free.

You can use turbo foam once a week or as needed to keep your drain in good condition. You can also use turbo foam as a preventive measure to prevent grease and fat buildup in your drain.

Targeting Stubborn Debris

You can use turbo foam to target any stubborn debris that is causing your drain to smell. You can also use turbo foam to prevent any future problems with your drain, such as clogs, backups, or overflows. 

Turbo foam is safe and effective for all types of pipes, including plastic, metal, and ceramic. Turbo foam is also eco-friendly and biodegradable, as it does not contain any harsh chemicals or solvents that can damage your pipes or harm the environment. You can learn more about turbo foam and other Brodi products by checking out the rest of our website.

Regular Maintenance with Baking Soda

Another method to get rid of smelly drain in the kitchen sink is to use baking soda as a regular maintenance product. Baking soda is a natural and inexpensive ingredient that can help keep your drain clean and odor-free. Here is how to establish a routine with baking soda for your drain:

•  Every night before you go to bed, sprinkle a quarter cup of baking soda into the drain and let it sit overnight. This can help absorb and neutralize any odors that may develop in your pipe.

•  Every morning when you wake up, run some hot water down the drain to flush the baking soda and any dirt or debris that it may have collected.

•  Once a week, add some vinegar to the baking soda and let it fizz for a few minutes. This can help enhance the cleaning and deodorizing effect of the baking soda and remove any stubborn gunk from the pipe.

You can use this routine with baking soda to keep your drain in good shape and prevent any smelly problems from occurring. You can also adjust the amount and frequency of baking soda and vinegar according to your needs and preferences.

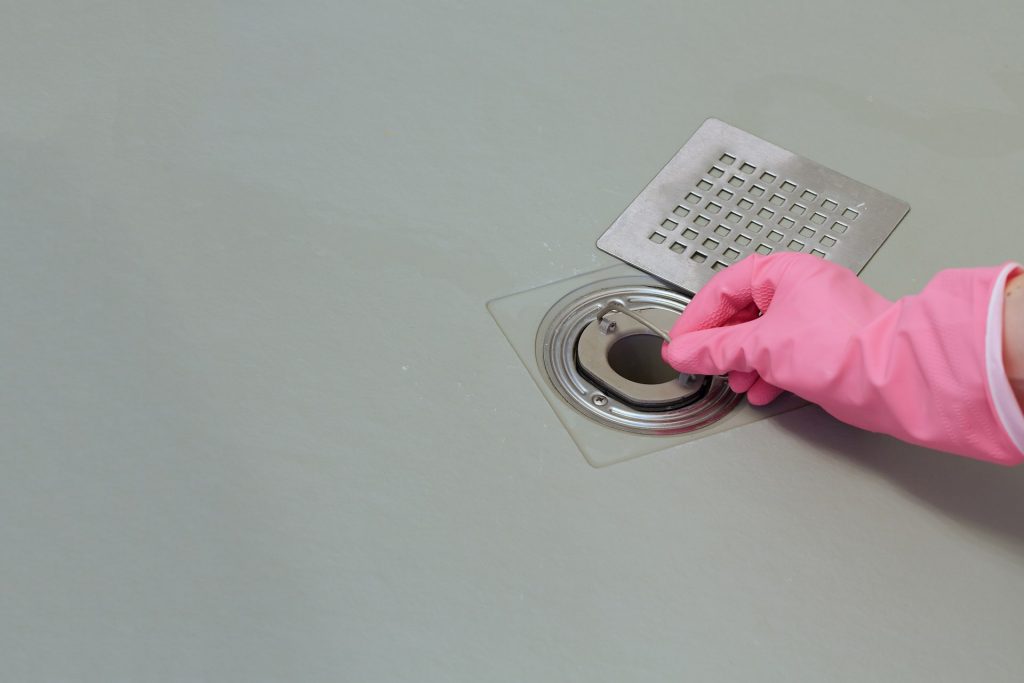
Check and Repair Leaks

Another method to get rid of smelly drain in your kitchen sink is to check and repair any leaks that may be present in your plumbing system. Leaks can cause water to seep out of your pipe and into your walls, floors, or cabinets, creating a moist and dark environment that can foster bacterial and mold growth. Leaks can also cause sewer gas to leak out of your pipe and into your kitchen, creating a foul and toxic smell that can harm your health and well-being. Here is how to check and repair leaks for your drain:

•  Inspect your pipe and fittings for any signs of leaks, such as cracks, holes, rust, corrosion, or moisture. You can also use a flashlight or a mirror to look for any hidden or hard-to-see leaks in your pipe.

•  If you find any leaks, mark them with a tape or a marker and turn off the water supply to your sink. You may need to use a wrench or a plier to loosen or tighten any nuts or bolts that may be causing the leaks.

•  Depending on the type and severity of the leaks, you may need to use different methods to repair them, such as:

•  Applying plumber’s tape, epoxy, or sealant to the leaky area and letting it dry. This can help seal and waterproof the leaky area and prevent water or gas from escaping.

•  Replacing the leaky pipe or fitting with a new one that is compatible and suitable for your plumbing system. This can help restore and improve the function and performance of your pipe and prevent further leaks or damage.

•  Calling a professional plumber to fix the leak for you. This can help ensure a safe and proper repair of the leak and prevent any complications or risks that may arise from a DIY repair.

You can check and repair leaks for your drain as soon as you notice them or as part of a regular maintenance schedule. You can also prevent leaks from occurring by using quality pipes and fittings and avoiding any excessive pressure or force on your pipe.

Importance of Leak Inspection

Checking and repairing leaks for your drain can have many benefits, such as:

•  It can help prevent water damage and mold growth in your home, as it can stop water from seeping out of your pipe and into your walls, floors, or cabinets, creating a moist and dark environment that can foster bacterial and mold growth.

•  It can help prevent sewer gas exposure and odor in your kitchen, as it can stop sewer gas from leaking out of your pipe and into your kitchen, creating a foul and toxic smell that can harm your health and well-being.

•  It can help prevent water waste and high water bills, as it can stop water from dripping or flowing out of your pipe and into your drain, wasting water and increasing your water consumption and cost.

•  It can help prevent plumbing problems and emergencies, as it can stop leaks from worsening or spreading and causing more damage or disruption to your plumbing system and your home.

Checking and repairing leaks for your drain can help you protect your health, your home, and your happiness.

Prompt Repair Strategies

When you find a leak in your drain, you should repair it as soon as possible to prevent it from worsening or causing more problems. Here are some prompt repair strategies that you can use:

•  If the leak is small and minor, you can try to fix it yourself using plumber’s tape, epoxy, or sealant, as mentioned above. This can help you save time and money and avoid calling a plumber.

•  If the leak is large and major, you should call a professional plumber to fix it for you, as mentioned above. This can help you ensure a safe and proper repair and avoid any complications or risks that may arise from a DIY repair.

•  If the leak is urgent and dangerous, you should call an emergency plumber to fix it for you as soon as possible. This can help you prevent any serious damage or harm that may result from the leak, such as flooding, fire, or explosion.

You should repair a leak in your drain promptly to prevent it from worsening or causing more problems. You should also follow the instructions and precautions that come with the repair products or services that you use to ensure a successful and safe repair.

Conclusion

In this blog, we have learned how to get rid of the smelly drain in your kitchen sink using some simple and natural methods. We have also learned how to prevent smelly drains from occurring in the first place by following some preventive measures. Here is a recap of the key strategies that we have discussed:

•  Use a combination of hot water, baking soda, and vinegar to remove grease, food particles, and bacteria from your drain and eliminate odors.

•  Use citrus fruits, such as lemons, oranges, grapefruits, or limes, to break down grease and fat in your pipe and freshen up your drain with a pleasant and refreshing scent.

•  Use Turbo Foam, which is a foaming drain maintainer, to dissolve and remove grease, fat, and food residue from your pipe and prevent clogs and backups.

•  Use baking soda as a regular maintenance product to keep your drain clean and odor-free by absorbing and neutralizing any odors that may develop in your pipe.

•  Check and repair any leaks that may be present in your plumbing system, as they can cause water damage, mold growth, sewer gas exposure, and odor in your kitchen.

By following these tips, you can maintain a fresh and inviting kitchen sink that will make your cooking and cleaning experience more enjoyable and satisfying. You can also protect your health, your home, and your happiness from the negative impacts of a smelly drain. We hope you found this blog helpful and informative. If you have any questions or comments, feel free to leave them below. Thank you for reading and have a great day! 

The Ultimate Guide to Keeping Floor Drains Odor-Free

Unpleasant odors wafting from floor drains can be a persistent issue in both residential and commercial spaces. The stench not only creates an uncomfortable environment but may also indicate underlying problems with drainage systems. In this comprehensive guide, we’ll explore effective strategies to keep your floor drains odor-free, ensuring a fresh and hygienic atmosphere.

Importance of Floor Drain Maintenance

Maintaining a clean and functional environment is essential for both residential and commercial spaces. One often overlooked yet critical aspect of this upkeep is floor drain maintenance. Floor drains play a pivotal role in preventing water accumulation, facilitating proper drainage, and averting potential hazards. Neglecting their care, however, can lead to a myriad of issues, with drain odors being a primary concern.

Understanding the Causes of Drain Odors

Unpleasant drain odors are often the result of accumulated debris, grease, soap scum, and other organic matter within the pipes. Over time, these substances can create a breeding ground for bacteria and fungi, leading to foul smells emanating from the drains. Additionally, stagnant water in the trap can evaporate, allowing sewer gasses to escape into the living or working space.

Regular floor drain maintenance is essential to prevent these issues. Simple tasks like removing debris, flushing drains with hot water, and using environmentally friendly cleaning solutions can go a long way in keeping the drains clear and odor-free. Timely maintenance not only ensures a pleasant environment but also prevents the potential health hazards associated with neglect.

The Health and Safety Implications of Neglecting Floor Drain Maintenance

1. Bacterial Growth:

Stagnant water and organic matter in neglected drains create an ideal environment for the growth of harmful bacteria. These bacteria can pose serious health risks, leading to infections and respiratory issues when they enter the air through drain odors.

2. Mold and Fungi:

Moisture and debris in drains contribute to the growth of mold and fungi. The release of mold spores into the air can trigger allergies and respiratory problems, affecting the well-being of occupants, especially those with pre-existing respiratory conditions.

3. Insect Infestations:

Standing water and organic material in drains attract insects such as flies and mosquitoes. These pests not only contribute to unsanitary conditions but can also carry diseases, putting the health of residents or employees at risk.

4. Structural Damage:

Neglected drains can lead to water damage and compromise the structural integrity of the building. Moisture seeping into walls and foundations can result in costly repairs and pose long-term risks to the safety of the structure.

5. Unpleasant Work or Living Environment:

Persistent drain odors can have a significant impact on the overall quality of life or work. Unpleasant smells can cause discomfort, reduce productivity, and create an unwelcoming atmosphere for both residents and employees.

The importance of floor drain maintenance cannot be overstated. Regular upkeep not only prevents the foul odors that result from neglected drains but also safeguards the health and well-being of the people in the space. 

Why Do Floor Drains Develop Odors?

Before we delve into the solutions, it’s important to understand why floor drains develop odors in the first place. Typically, odors occur due to a buildup of organic matter, such as hair, soap scum, dirt, and food particles, that gets trapped in the drain. The decaying organic matter creates an environment for bacteria and other microorganisms to thrive, resulting in unpleasant odors.

Maintaining a clean and functional environment requires a comprehensive approach, and one often overlooked aspect is the regular cleaning of floor drains. These drains play a crucial role in preventing water damage, foul odors, and potential health hazards. Let’s dive into the significance of regular cleaning step-by-step instructions for a thorough cleaning, and recommendations for establishing a cleaning routine.

Step-by-step instructions for cleaning your floor drain

Regular Cleaning

The first and most important step in preventing floor drain odors is regular cleaning. Establishing a cleaning routine helps remove any accumulated debris and reduces the chances of bacterial growth. Here’s a step-by-step process for cleaning your floor drain:

  1. Remove the drain grate or cover.
  2. Use gloves to manually remove any visible debris or sediment from the drain. You can use a brush or a small scoop for this.
  3. Prepare a mixture of hot water and mild detergent.
  4. Pour the mixture down the drain and scrub the interior of the drain using a long-handled brush or a drain brush specifically designed for this purpose.
  5. Rinse the drain thoroughly with clean water to remove any detergent residue.

Perform this cleaning process at least once a month or more frequently if you notice any odors developing.

Baking Soda and Vinegar

If you’re dealing with stubborn odors, a combination of baking soda and vinegar can prove to be highly effective in eliminating them. Baking soda, or sodium bicarbonate, is a natural deodorizer and mild abrasive, while vinegar is a powerful cleaning agent. Here’s how you can use them to freshen up your floor drain:

  1. Start by pouring a cup of baking soda down the drain.
  2. Follow it with a cup of vinegar.
  3. Let the mixture fizz and react for a few minutes, as it helps break down the organic matter causing the odor.
  4. Finally, flush the drain with hot water to wash away the residue.

This simple home remedy can help neutralize odors and improve the overall freshness of your floor drain. Repeat this process regularly to effectively control unpleasant smells.

Flush with Hot Water

In addition to regular cleaning, flushing your floor drain with hot water is a simple yet effective method to keep it odor-free. Hot water helps melt and flush away any build-up or debris inside the drain pipe. Follow these steps to flush your drain with hot water:

  1. Bring a large pot of water to a rolling boil.
  2. Slowly pour the boiling water down the drain, making sure it reaches the pipe as far as possible.
  3. Repeat this process at least once a week to prevent any build-up and maintain a clean-smelling drain.

Hot water not only helps remove potential odor sources but also improves the overall flow of the drain. It’s a quick and easy maintenance practice that can go a long way in keeping your floor drains odor-free.

Install Drain Traps or Screens

Prevention is always better than a cure. Installing drain traps or screens is a proactive measure to prevent debris and solid particles from entering the drain in the first place. These devices act as filters, capturing hair, dirt, food particles, and other objects before they can become trapped and cause bad smells.

There are various types of drain traps and screens available, including mesh screens, strainers, and built-in traps. Choose one that suits your specific drain type and make sure the device is compatible with your floor drain. Regularly clean and empty the trap or screen to maintain its effectiveness in preventing odors.

Consider Using Citrus-Based Dry Drain Maintainer

In addition to enzyme cleaners, another environmentally friendly option to combat odors in your floor drains is using citrus-based dry drain maintainers. These products utilize the natural cleaning power of citrus to break down organic matter and eliminate odors. Here’s how you can use a citrus-based dry drain maintainer:

  1. Purchase a citrus-based dry drain maintainer designed Vapour Block

            for your floor drain system.

Vapour Block
  1. Follow the instructions on the product’s label for the recommended amount to use.
  2. Pour the citrus-based dry drain maintainer down the drain, ensuring it reaches the pipe as far as possible.
  3. Allow the product to sit for the recommended period, typically several hours or overnight.
  4. Flush the drain with hot water to remove any residue and ensure the product is fully rinsed away.

Citrus-based dry drain maintainers not only effectively eliminate odors but also help prevent future buildup, providing a long-lasting solution for odor-free floor drains. Check Brodi for more maintenance items.

Recommended Cleaning Frequency and Tips for Maintaining a Schedule

Frequency:

The recommended frequency for floor drain cleaning depends on factors such as usage and the type of debris present. For residential spaces, a monthly cleaning routine is often sufficient. In high-traffic commercial areas, more frequent cleaning may be necessary.

Establish a Schedule:

Incorporate drain cleaning into your regular cleaning schedule. Whether you clean weekly, bi-weekly, or monthly, consistency is key to preventing issues before they arise.

Monitor High-Traffic Areas:

Pay special attention to drains in high-traffic areas or places where debris accumulates quickly. These areas may require more frequent cleaning to ensure optimal performance.

Professional Maintenance:

If you’ve tried the above methods and are still experiencing persistent odors, it’s time to seek professional help. A plumbing professional can assist you in identifying the root cause of the odor and perform more thorough cleaning and maintenance procedures.

A plumber may use specialized equipment, such as a drain snake or hydro jetting, to remove stubborn clogs or blockages that could be contributing to the odor. They can also inspect the drain pipe for any cracks, leaks, or damaged seals that may require repair or replacement.

While professional maintenance may come with a cost, it offers a comprehensive solution to your floor drain problems and ensures long-term odor prevention.

Installing Drain Traps or Screens: A Key Strategy for Preventing Unpleasant Odors

Installing drain traps or screens is a proactive measure that not only prevents debris from entering your plumbing system but also plays a crucial role in controlling drain odors. In this guide, we’ll explore the importance of prevention, provide an overview of different types of drain traps and screens, offer step-by-step instructions for installation, and share tips for cleaning and maintaining these devices.

The Importance of Prevention in Controlling Drain Odors

1. Odor Prevention:

Drain traps and screens act as barriers, preventing debris and organic matter from entering the drain. By stopping these substances before they can accumulate in the pipes, you significantly reduce the risk of foul odors emanating from the drain.

2. Bacterial Growth Mitigation:

By blocking the entry of debris, drain traps and screens also inhibit the growth of bacteria and fungi in the pipes. This is essential for maintaining a hygienic environment and preventing potential health hazards.

3. Long-Term Maintenance:

Investing in prevention measures ensures long-term maintenance of your plumbing system. Regular cleaning becomes more manageable, and the risk of costly repairs due to clogs or pipe damage is significantly reduced.

Overview of Different Types of Drain Traps and Screens

P-Trap:

The classic P-trap is a U-shaped pipe that holds a small amount of water, creating a barrier between the drain and the air in the pipes. This water barrier prevents sewer gases from entering the living or working space.

Mesh Screens:

Mesh screens are simple, cost-effective devices that fit over the drain opening. They catch hair, debris, and other particles, preventing them from entering the drain.

Basket Strainers:

Commonly used in kitchen sinks, basket strainers are inserted into the drain opening to catch food particles and prevent clogs.

Pop-Up Stoppers:

Often found in bathroom sinks and tubs, pop-up stoppers not only prevent debris from entering the drain but also provide a convenient way to stop or release water flow.

Step-by-Step Instructions for Installing Drain Traps or Screens

Choose the Right Type:

Identify the type of drain trap or screen that best suits your needs based on the type of drain and the potential for debris.

Remove Existing Debris:

Before installing, ensure the drain is free from existing debris. Use a snake or other tools to clear any obstructions.

Install P-Trap:

For P-traps, carefully install the U-shaped pipe, ensuring a proper seal. Tighten the connections, but be cautious not to overtighten and damage the fittings.

Place Screens or Stoppers:

Position mesh screens, basket strainers, or pop-up stoppers over the drain openings. Make sure they fit securely and can be easily removed for cleaning.

Tips for Cleaning and Maintaining Drain Traps or Screens

Regular Inspection:

Periodically inspect the traps or screens for any signs of damage or wear. Replace them if necessary.

Routine Cleaning:

Incorporate regular cleaning of traps or screens into your overall maintenance routine. Remove and clean them to prevent buildup.

Use citrus-based Cleaners:

Consider using citrus-based Vapour Block cleaners to break down organic matter in traps and pipes, promoting optimal functionality.

Professional Maintenance:

If you encounter persistent issues or notice a decline in drainage performance, seek professional assistance. Plumbers can conduct thorough inspections and provide solutions for more complex problems.

Installing drain traps or screens is a practical and effective way to prevent drain odors and maintain a healthy plumbing system. By choosing the right type, following proper installation steps, and implementing routine cleaning and maintenance, you can ensure that these devices continue to serve their purpose effectively, contributing to a clean and odor-free living or working space.

Additional Tips and Best Practices for Floor Drain Maintenance

Keeping Floors and Surrounding Areas Clean and Dry

Maintaining a clean and dry environment around your floor drains is paramount for effective drain performance. Regularly sweep or mop the floors to prevent debris from entering drains, and promptly address spills to avoid potential water damage. A dry environment reduces the likelihood of mold, bacterial growth, and unpleasant odors.

Avoiding Common Mistakes in Floor Drain Maintenance

While caring for your floor drains, it’s crucial to steer clear of common mistakes. Avoid using harsh chemical cleaners that can damage pipes or harm the environment. Additionally, refrain from pouring grease or oil down drains, as these substances can solidify and lead to clogs. Opt for environmentally friendly cleaning solutions and dispose of grease in designated containers.

Regular Inspections for Potential Issues

Implementing routine inspections is a proactive measure to identify potential issues before they escalate. Check for signs of water damage, leaks, or unusual odors around floor drains. Addressing problems at an early stage can save you from more extensive repairs and ensure the continued functionality of your drainage system.

Maintenance Reminders and Checklist

Creating a maintenance checklist and setting regular reminders can help you stay on top of floor drain care. Include tasks such as clearing debris, flushing drains with hot water, and inspecting drain traps or screens. Whether you use digital tools or traditional methods, a checklist ensures that no aspect of maintenance is overlooked.

Maintenance Checklist:

✅ Clear debris from drains.

✅ Flush drains with hot water.

✅ Inspect and clean drain traps or screens.

✅ Check for signs of leaks or water damage.

✅ Use enzyme cleaners for bacterial control.

✅ Conduct periodic professional inspections.

Conclusion

Keeping your floor drains odor-free requires regular maintenance and preventive measures. Incorporating these practices into your cleaning routine will help you eliminate odors and maintain a fresh-smelling environment. Regularly clean your floor drains, use baking soda and vinegar, flush with hot water, install drain traps or screens, consider enzyme cleaners, and seek professional maintenance if needed.

By committing to regular maintenance, you not only prevent potential issues but also contribute to the overall well-being of your living or working space. A clean and odor-free environment awaits those who take the initiative to care for their floor drains. Follow the guide, make it a habit, and enjoy the benefits of a healthier and more pleasant living or working environment.

How to Remove Water Spots on the Ceiling

Water spots on the ceiling are like silent messengers, whispering about hidden troubles within your home. These seemingly innocuous stains often emerge as a result of roof leaks, a common culprit arising from damaged or improperly sealed roofs. When heavy rain or snowmelt infiltrates through compromised shingles or worn-out flashing, it trickles down, leaving its mark on the ceiling. Plumbing issues also play a significant role; even minor pipe leaks can cause substantial damage over time, manifesting as water spots. 

Moreover, condensation, especially in poorly ventilated spaces, fosters the ideal environment for water spots to thrive. Understanding that these stains are not merely cosmetic but indicative of deeper issues is the first step towards effective removal. By delving into the root causes, including roof vulnerabilities, plumbing intricacies, and condensation challenges, homeowners can embark on a targeted approach to eliminate these marks and safeguard their ceilings from future intrusions.

Beneath the surface of a water spot lies a story of home maintenance, or the lack thereof. HVAC systems, essential for regulating indoor climate, can turn rogue when drainage lines clog or condensate pans malfunction, leading to unwelcome ceiling stains. 

Additionally, in colder regions, ice dams pose a significant threat. When snow accumulates on the roof and then melts, it refreezes at the roof’s edge, creating a dam that prevents proper drainage. This trapped water can seep into the home, resulting in those persistent marks on the ceiling. Exterior factors, including damaged siding or faulty caulking around windows, permit rainwater to find its way indoors. Recognizing the intricate interplay of these factors is vital for homeowners striving to preserve their ceilings’ pristine appearance. 

Armed with this knowledge, one can embark on the journey of removal equipped with not just cleaning tools, but a deep understanding of the root causes, ensuring a lasting solution to the challenge of water spots on the ceiling.

Precautions and Safety Measures for Removing Water Spots on Ceiling

Tackling water spots on the ceiling can be a daunting task, but prioritizing safety is non-negotiable. Before you start the ceiling water stain removal process, it’s essential to take the following precautions and safety measures to create a secure environment for yourself and anyone else involved.

Turn Off Electricity: If the water spot is near any electrical fixtures or wiring, the first step is to turn off the electricity in the affected area. Water and electricity are a dangerous combination, and taking this precaution significantly reduces the risk of electrical accidents during the cleaning process.

Wear Protective Gear: Equip yourself with appropriate safety gear, including gloves and safety goggles. Gloves protect your hands from chemicals, dirt, and potential sharp edges, while safety goggles shield your eyes from cleaning solutions and debris dislodged during cleaning.

Use a Stable Ladder: If accessing the ceiling is necessary, use a stable and secure ladder placed on an even surface. Never overreach or stand on the top rungs of the ladder. Having a spotter to hold the ladder steady adds an extra layer of safety, preventing accidents caused by ladder instability.

Ensure Proper Ventilation: Maintain good ventilation in the area you are working in. Open windows and use fans to ensure proper air circulation. Adequate ventilation helps disperse fumes from cleaning products and prevents the accumulation of potentially harmful gases, creating a healthier environment for everyone involved.

Test Cleaning Solutions: Before applying any cleaning solutions or stain removers, test them on a small, inconspicuous area of the ceiling. This test ensures that the solution is compatible with your ceiling material and won’t cause damage or discoloration.

Work in a Well-Lit Area: Proper lighting is essential to see the water spots clearly and to carry out the removal process effectively. Make sure the area is well-lit using natural or artificial light sources, which reduces the likelihood of accidents and ensures a thorough cleaning job.

Keep Children and Pets Away: During the cleaning process, restrict access to the work area. Children and pets should be kept away to prevent accidents and minimize distractions. Creating a controlled environment ensures focused attention and safer conditions for everyone involved.

Proper Disposal of Chemicals: If you’re using chemical cleaning products, follow the manufacturer’s instructions for proper disposal of containers and any leftover solutions. Avoid pouring chemicals down the drain or disposing of them haphazardly to protect the environment and those handling waste.

By adhering to these safety precautions, you not only safeguard yourself and others from potential accidents but also create a conducive environment for efficient and secure water spot removal. Prioritizing safety ensures a smooth and worry-free cleaning process, allowing you to restore your ceiling to its spotless glory.

Methods to Remove Ceiling Water Stains

There are several methods you can try to remove ceiling stains, depending on the cause of the stain and the type of ceiling material. Here are some common methods:

Identify the Cause: Before attempting to remove the stain, it’s important to identify the cause. Ceiling stains can be caused by water leaks, smoke, mold, or other substances. Identifying the cause will help you choose the appropriate method for removal and prevent future stains.

Clean with Soap and Water: For water-based stains or mild stains, you can try cleaning the ceiling with a mixture of mild dish soap and water. Use a sponge or soft cloth to gently scrub the stained area. Be careful not to oversaturate the ceiling, as excessive moisture can damage the ceiling material.

Bleach Solution: For mold or mildew stains, you can create a solution of equal parts water and bleach. Spray or apply the solution to the stained area and let it sit for a few minutes. Then, scrub the area with a sponge or brush. Be sure to wear gloves and work in a well-ventilated area when using bleach.

Vinegar Solution: Vinegar is a natural cleaner that can be effective against certain stains. Mix equal parts of water and white vinegar, apply it to the stain, and let it sit for a while before gently scrubbing the area. Rinse the ceiling with clean water afterward.

Commercial Stain Removers: There are various commercial stain removers available in the market specifically designed for removing ceiling stains. Follow the manufacturer’s instructions carefully when using these products.

Repainting: If the stain is stubborn and cannot be removed completely, you can consider repainting the ceiling. Use a stain-blocking primer to prevent the stain from bleeding through the new paint. Choose a paint color that matches the rest of the ceiling.

Always test any cleaning solution or method in an inconspicuous area of the ceiling first to ensure it doesn’t damage the material further. Safety precautions, such as wearing gloves and ensuring good ventilation, should be followed when using cleaning agents.

Choosing the Right Ceiling Water Stain Remover

When it comes to removing stubborn water spots on your ceiling, specialized products can be a game-changer. However, selecting the right ceiling water stain remover is crucial for an effective and safe cleaning process. One remarkable product that stands out in this regard is the Renew Acoustical Ceiling Tile Restorer from Brodi.

Why Choose Renew Acoustical Ceiling Tile Restorer?

Brodi’s Renew Acoustical Ceiling Tile Restorer is a powerful and innovative solution designed specifically for restoring water-stained ceiling tiles. What sets it apart is its advanced formula, engineered to dissolve stains and revive the original appearance of acoustical ceiling tiles. This product offers a hassle-free application process, making it an ideal choice for both homeowners and professionals.

Key Benefits:

Efficient Stain Removal: Renew Acoustical Ceiling Tile Restorer effectively dissolves water spots and stains on acoustical ceiling tiles, leaving them looking brand new.

Safe for Ceiling Tiles: This product is formulated to be gentle on ceiling tiles while being tough on stains. It ensures thorough cleaning without causing damage or discoloration.

User-Friendly Application: With a user-friendly application process, you can restore your ceiling tiles without the need for extensive expertise. The convenience of use makes it accessible for everyone.

Time and Cost-Effective: By rejuvenating stained tiles, this product saves you the hassle of costly replacements. It offers a cost-effective solution that helps you retain the aesthetics of your space without breaking the bank.

Long-Lasting Results: Renew Acoustical Ceiling Tile Restorer doesn’t just provide a temporary fix. Its long-lasting results ensure that your ceiling tiles remain free from water spots, enhancing the longevity of your investment.

When it comes to specialized products, choosing a reliable and effective stain remover like Renew Acoustical Ceiling Tile Restorer ensures that your ceiling not only looks impeccable but also stands the test of time. With Brodi’s innovative solution, you can bid farewell to water spots and welcome a renewed, spotless ceiling in your home or office space.

Step-by-Step Guide to Using Renew Acoustical Ceiling Tile Restorer

Renew Acoustical Ceiling Tile Restorer is a specially formulated solution designed to rejuvenate and restore acoustic ceiling tiles. Whether your tiles are stained due to water damage, smoke, or general wear and tear, this restorer can help revive their original appearance. It works on various types of ceiling tiles, including mineral fiber and fiberglass, and provides long-lasting results. Lets jump to the using guide:

Step 1: Gather Your Supplies

Before you begin, make sure you have all the necessary supplies, including Renew Acoustical Ceiling Tile Restorer, a clean cloth or sponge, and a ladder if your ceiling is out of reach.

Step 2: Prepare the Area

Clear the area beneath the ceiling tiles to avoid any potential mess. Lay down drop cloths or plastic sheets to protect your floors and furniture.

Step 3: Clean the Ceiling Tiles

Start by cleaning the ceiling tiles to remove dust, dirt, and grime. Use a mild soap and water solution or a gentle all-purpose cleaner to wipe down the tiles. Allow them to dry completely before moving on to the next step.

Step 4: Apply Renew Acoustical Ceiling Tile Restorer

Shake the Renew Acoustical Ceiling Tile Restorer well before use. Pour a small amount onto a clean cloth or sponge and apply it evenly across the surface of the ceiling tiles. Work in small sections to ensure thorough coverage.

Step 5: Let It Dry

Allow the restorer to dry completely. Drying times may vary depending on the product and environmental conditions. Refer to the product label for specific instructions.

Step 6: Inspect the Results

Once the ceiling tiles are completely dry, inspect the results. You’ll likely notice a significant improvement in the color and overall appearance of the tiles. If necessary, repeat the process for stubborn stains or areas that require additional attention.

Step 7: Enjoy Your Revitalized Space

With your ceiling tiles restored to their original beauty, step back and admire the transformation. Your space will look fresher, brighter, and more inviting, all thanks to Renew Acoustical Ceiling Tile Restorer.

Renew Acoustical Ceiling Tile Restorer offers a convenient and effective solution to refresh your space without the hassle and cost of replacing ceiling tiles. By following these simple steps, you can easily restore your ceiling tiles and enjoy a more aesthetically pleasing environment.

Ready to transform your space? Click here to purchase Renew Acoustical Ceiling Tile Restorer and experience the difference for yourself. Say goodbye to stained and worn-out ceiling tiles and hello to a revitalized, appealing space! Visit Brodi for more items!

Professional Assistance – When to Call in the Experts 

Dealing with ceiling water stains can be a daunting task, especially when the root cause is elusive or the stains persist despite your best efforts. In such situations, knowing when to seek professional assistance can save you time, money, and stress.

Complex Water Damage:

If your ceiling is marred by extensive water stains that seem to spread with time, it’s a clear indicator of a complex water damage issue. Professional experts possess the experience to assess the severity of the damage accurately. Their expertise enables them to identify hidden leaks and structural vulnerabilities that might not be visible to the untrained eye. Addressing complex water damage promptly not only restores your ceiling but also prevents potential structural issues in your home.

Persistent Stains:

Stubborn water spots that reappear after repeated removal attempts signify an underlying problem. Professionals can conduct meticulous inspections to determine the cause of these persistent stains. Their diagnostic skills enable them to identify hidden leaks, ensuring that the root cause is effectively eliminated. By addressing both the visible stains and the hidden issues, experts provide a lasting solution that prevents the recurrence of water spots.

Mold Growth and Health Concerns:

Water spots often create a breeding ground for mold and mildew, posing health risks to your household. If you notice mold accompanying the water stains, it’s an indication of prolonged moisture exposure. Professionals are equipped to handle mold remediation safely and efficiently. They not only remove visible mold but also implement measures to prevent its return, ensuring a clean, healthy environment for your family.

Structural Integrity Concerns:

Ceiling water stains, if left unattended, can compromise the structural integrity of your home. Professionals conduct thorough assessments to evaluate if the water damage has weakened the structural components. Their expertise allows them to reinforce weakened structures, ensuring the safety and stability of your home. By preserving the structural integrity, experts provide long-term protection against potential hazards.

Insurance Claims and Documentation:

In situations involving extensive water damage, involving professionals is essential for insurance purposes. Insurance companies often require detailed documentation of the damage and the restoration process. Certified experts understand the intricacies of insurance claims and provide comprehensive reports, photographs, and documentation. Their expertise streamlines the claims process, ensuring that you receive rightful compensation for the necessary repairs.

Calling in the experts for ceiling water stain removal is crucial when facing complex issues, persistent stains, mold growth, structural concerns, or insurance-related needs. Their specialized knowledge and skills not only restore your ceiling but also provide peace of mind, knowing that your home is in capable hands. By investing in professional assistance, you ensure the longevity, safety, and aesthetics of your living space.

Keeping Your Ceiling Spotless in the Future

Maintaining a spotless ceiling requires a proactive approach focused on prevention. Regular inspections are the cornerstone of this strategy. 

✅ Routinely check your roof for damaged shingles, ensuring they’re intact to thwart leaks during heavy rainfall. 

✅ Keeping gutters and downspouts clean is equally essential; debris buildup can cause water overflow, leading to stains. 

✅ Adequate attic insulation not only enhances energy efficiency but also prevents heat escape, curbing the formation of ice dams that can cause water seepage. 

✅ Proper ventilation in moisture-prone areas like bathrooms and kitchens reduces condensation, minimizing the risk of water spots. 

✅ Seal gaps and cracks in your home’s exterior, including windows and doors, using high-quality sealants to block external water infiltration.

✅ Regularly inspect plumbing fixtures, pipes, and appliances for leaks; even a minor drip can lead to significant damage over time. 

✅ Address any plumbing issues promptly. 

✅ Invest in a quality roof coating. This protective layer adds an extra shield against water penetration. 

By remaining vigilant and proactive in your maintenance efforts, you create a robust defense against water stains. Through these preventive measures, you not only preserve the aesthetic appeal of your ceiling but also ensure the longevity and integrity of your entire home.