Category Archives: Winter Maintenance Specialty

Benefits of Wax Coating: Enhancing your Snow Removal Equipment

Are you tired of snow sticking to your snow removal equipment and slowing you down? If so, it’s time to consider the benefits of wax coating for enhancing your equipment’s performance. Wax coating, a popular choice among professionals, not only makes your tools look sleek and professional but also improves their functionality in snowy conditions.

When applied to your snow shovels, plows, or blowers, wax coating forms a protective layer that helps prevent snow from sticking to the surface. This means you can remove snow more efficiently, saving time and effort. Additionally, the slick surface created by wax coating allows the equipment to glide smoothly over the snow, reducing resistance and making the whole process easier.

Not only does wax coating enhance your snow removal equipment’s performance, but it also helps extend its lifespan. By protecting your tools from rust and corrosion, the coating ensures they remain in top condition, capable of tackling even the harshest winter weather.

Investing in wax coating for your snow removal equipment can make a significant difference in your snow removal efficiency and the overall maintenance of your tools. So why wait? Get your equipment coated today and experience the benefits for yourself.

Advantages of Wax Coating for Snow Removal Equipment

Snow removal can be a challenging task, especially when the snow sticks to your equipment, making it difficult to clear the way effectively. This is where wax coating comes in handy. When applied to your snow shovels, plows, or blowers, wax coating forms a protective layer that helps prevent snow from sticking to the surface.

The primary advantage of wax coating is that it allows you to remove snow more efficiently, saving time and effort. The slippery nature of the wax coating ensures that the snow slides off easily, without getting clogged on the surface of your equipment. This means you can clear larger areas in a shorter amount of time, increasing your overall productivity.

Additionally, the slick surface created by wax coating allows the equipment to glide smoothly over the snow, reducing resistance and making the whole process easier. You’ll experience less strain on your arms and back, resulting in a more comfortable snow removal experience.

How Wax Coating Enhances Performance and Durability

Not only does wax coating enhance your snow removal equipment’s performance, but it also helps extend its lifespan. By protecting your tools from rust and corrosion, the coating ensures they remain in top condition, capable of tackling even the harshest winter weather.

Snow and ice can cause damage to your equipment, leading to costly repairs or replacements. Wax coating acts as a barrier, preventing moisture from seeping into the metal components and causing rust. The coating also protects against salt and other corrosive substances commonly used in winter road maintenance.

Moreover, wax coating provides a layer of insulation, reducing the risk of freezing and further damage to your snow removal equipment. This added protection ensures that your tools remain reliable and effective throughout the winter season, saving you money in the long run.

Protection Against Corrosion and Rust With Wax Coating

One of the biggest concerns when it comes to snow removal equipment is the potential for corrosion and rust. Winter weather conditions, combined with exposure to moisture and salt, can quickly deteriorate the metal components of your tools. However, with the application of wax coating, you can significantly reduce the risk of corrosion and rust.

Wax coating forms a protective barrier on the surface of your equipment, preventing moisture from coming into direct contact with the metal. This barrier inhibits the oxidation process that leads to rust formation. By keeping your snow removal equipment rust-free, you can ensure its optimal performance and longevity.

Furthermore, wax coating also protects against the corrosive effects of salt and other de-icing chemicals. These substances can cause significant damage to your tools if left untreated. The wax coating acts as a shield, preventing the salt from penetrating the metal and causing corrosion.

Increased Efficiency and Reduced Maintenance With Wax Coating

Snow removal can be a time-consuming and physically demanding task. However, with wax coating, you can significantly increase your efficiency and reduce the effort required to clear snow.

The slick surface created by wax coating allows your equipment to glide smoothly over the snow, minimizing resistance. This means you can clear snow more quickly and effortlessly, resulting in improved productivity.

Additionally, the reduced friction provided by wax coating helps prevent snow from sticking to the surface of your tools. This means you won’t have to constantly stop and clean off the snow, saving you valuable time during the snow removal process.

Moreover, the wax coating reduces the buildup of ice on your equipment, further enhancing its efficiency. The slippery surface prevents ice from forming and accumulating, allowing you to continue working without interruption.

With wax coating, you’ll also experience reduced maintenance requirements for your snow removal equipment. The protective layer provided by the coating helps repel dirt, debris, and other contaminants, keeping your tools cleaner for longer. This means less time spent on regular cleaning and maintenance, allowing you to focus on the task at hand.

Longevity and Cost-Effectiveness of Wax Coating

Investing in wax coating for your snow removal equipment can make a significant difference in its longevity and overall cost-effectiveness. By protecting your tools from rust and corrosion, the coating ensures they remain in top condition, capable of tackling even the harshest winter weather.

Snow removal equipment is a significant investment, and it’s essential to maximize its lifespan. Wax coating acts as a barrier, preventing moisture and corrosive substances from damaging the metal components. This added protection extends the life of your tools, reducing the need for frequent repairs or replacements.

Moreover, the cost-effectiveness of wax coating lies in its ability to enhance the efficiency of your snow removal equipment. By reducing resistance and preventing snow from sticking, you can clear larger areas in less time, ultimately saving on labor costs.

Additionally, the reduced maintenance requirements for wax-coated equipment result in further cost savings. With less time spent on cleaning and upkeep, you can allocate resources to other areas of your snow removal operation.

Steps to Apply Wax Coating to Snow Removal Equipment

Applying wax coating to your snow removal equipment is a straightforward process that can yield significant benefits. Here are the basic steps to follow:

1. Clean the equipment: Before applying wax coating, ensure that your tools are clean and free from dirt, debris, and rust. Use a mild detergent and water to thoroughly clean the surfaces, and allow them to dry completely.

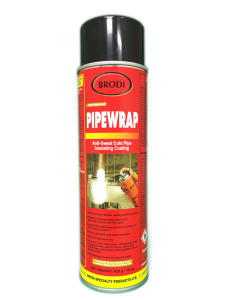
2. Choose the right wax coating: There are various types of wax coatings available, each designed for specific materials and applications. Consider the type of snow removal equipment you have and select a wax coating that is suitable for its surface.

3. Apply the wax coating: Follow the manufacturer’s instructions for applying the wax coating. Generally, this involves using a sponge or cloth to evenly spread the wax over the surfaces of your equipment. Allow the coating to dry completely before using the tools.

4. Maintain the wax coating: To ensure the longevity of the wax coating, it’s essential to regularly inspect and maintain your snow removal equipment. Check for any signs of wear or damage to the coating, and reapply as necessary.

Types of Wax Coatings for Different Snow Removal Equipment

There are various types of wax coatings available, each designed to suit different types of snow removal equipment. Here are some common types of wax coatings:

1. Carnauba wax: Carnauba wax is a natural wax derived from the leaves of the carnauba palm tree. It is known for its durability and high melting point, making it suitable for heavy-duty snow removal equipment.

2. Polymer-based wax: Polymer-based wax coatings provide excellent protection against rust and corrosion. They are often used for smaller snow removal tools, such as shovels and blowers.

3. Silicone wax: An exclusive fusion of silicone and wax coating creates a smooth, non-adhesive layer, effectively warding off the adherence of ice and snow to plows, shovels, and other snow removal equipment.

4. Synthetic wax: Synthetic waxes are formulated to offer long-lasting protection and enhanced performance. They are ideal for larger snow removal equipment, such as plows and snow blowers.

5. Clearcoat wax: Clearcoat wax is a transparent wax coating that provides a glossy finish while protecting your equipment from the elements. It can be used on various types of snow removal tools.

When selecting a wax coating for your snow removal equipment, consider the specific requirements of your tools and the type of snow conditions you typically encounter. Consult with a professional or the manufacturer of the wax coating for expert advice.

Maintenance Tips for Snow Removal Equipment with Wax Coating

To ensure the longevity and optimal performance of your snow removal equipment with wax coating, it’s essential to follow proper maintenance practices. Here are some tips to keep in mind:

1. Regularly inspect your equipment for any signs of wear or damage to the wax coating. If you notice any areas where the coating has worn off, reapply the wax to ensure continued protection.

2. After each use, clean your equipment thoroughly to remove any dirt, debris, or salt residue that may have accumulated. Use a mild detergent and water to clean the surfaces, and dry them thoroughly to prevent moisture buildup.

3. Avoid exposing your wax-coated equipment to extreme temperatures or harsh weather conditions when not in use. Store your tools in a dry and protected environment to prevent damage to the wax coating.

4. If you notice any signs of rust or corrosion on your equipment, take immediate action to address the issue. Use a rust remover or a wire brush to remove any rust spots, and reapply the wax coating to protect against further damage.

By following these maintenance tips, you can ensure that your snow removal equipment remains in top condition, providing reliable performance throughout the winter season.

The Ultimate Guide to Auto Undercoating: Why It’s Essential for Every Car Owner

As a responsible car owner, keeping your vehicle in top-notch condition should be a top priority. One important aspect of car maintenance that often gets overlooked is auto undercoating. This ultimate guide will shed light on why auto undercoating is essential and why every car owner should consider it.

Auto undercoating serves as a protective layer between your car’s body and the road. It shields your vehicle from various elements such as moisture, salt, gravel, and other debris that can cause rust and corrosion. By preventing these damaging elements from reaching the vulnerable areas of your car, undercoating can significantly extend the life of your vehicle.

Not only does undercoating protect against corrosion, but it also helps reduce road noise and vibrations, making for a smoother and quieter ride. Additionally, it can act as an added layer of insulation, helping to keep your car’s interior cooler during the hot summer months and warmer during the winter.

In this comprehensive guide, we will explore the different types of undercoating, the benefits they offer, and the best practices for applying undercoating to your car. Don’t neglect this important step in car maintenance. Read on to discover why auto undercoating is essential for every car owner.

The Importance of Auto Undercoating

Auto undercoating refers to the process of applying a protective coating to the underside of a car. It involves spraying a layer of specialized material onto the exposed metal surfaces, such as the chassis, floor pans, and wheel wells. This coating acts as a barrier that prevents moisture, salt, and other corrosive substances from coming into direct contact with the metal, reducing the risk of rust and corrosion.

Undercoating can be done using various materials, including rubberized coatings, asphalt-based coatings, and wax-based coatings. The choice of undercoating material depends on factors such as the climate in which you live, the type of driving you do, and personal preference.

Benefits of Auto Undercoating

Auto undercoating is crucial for maintaining the structural integrity and longevity of your car. The underside of a vehicle is constantly exposed to harsh elements, such as road salt, gravel, and moisture. Over time, these elements can cause corrosion, leading to rust and deterioration of the metal components.

By applying an undercoating, you create a protective barrier that prevents these elements from reaching the vulnerable areas of your car. This significantly reduces the risk of rust and corrosion, prolonging the lifespan of your vehicle.

Furthermore, undercoating helps to reduce road noise and vibrations. The coating acts as a sound-dampening barrier, absorbing the noise generated by the tires and the road surface. This results in a quieter and more comfortable ride, especially on rough roads or highways.

Additionally, undercoating can provide insulation benefits. It helps to keep your car’s interior cooler during hot summer months by reflecting heat away from the underside of the vehicle. In colder climates, undercoating acts as an added layer of insulation, helping to retain heat and keep the interior warmer.

1. Corrosion Prevention with Proflex: One of the key advantages of utilizing auto undercoating, particularly with products like Proflex, is its effective corrosion protection. By establishing a protective barrier that shields the vehicle’s metal surfaces from corrosive elements, Proflex undercoating markedly diminishes the likelihood of rust and deterioration.

2. Extended lifespan: With proper undercoating, you can significantly extend the lifespan of your vehicle. By preventing rust and corrosion, you ensure that the structural integrity of your car remains intact, allowing it to withstand the test of time.

3. Reduced maintenance costs: Rust and corrosion can lead to costly repairs and replacements. By investing in undercoating, you can minimize the need for expensive repairs, saving you money in the long run.

4. Improved resale value: A well-maintained car with a solid undercoating can fetch a higher resale value. Prospective buyers will appreciate the added protection against rust and corrosion, making your vehicle more desirable in the used car market.

5. Enhanced driving experience: Undercoating helps to reduce road noise and vibrations, resulting in a smoother and quieter ride. This can make your driving experience more enjoyable, especially on long trips or rough roads.

Common Misconceptions about Auto Undercoating

1. New cars don’t need undercoating: While new cars often come with some form of factory undercoating, it may not provide sufficient protection in certain climates or driving conditions. Adding an additional layer of undercoating can provide extra protection and peace of mind.

2. Undercoating is only for off-road vehicles: Undercoating is beneficial for all types of vehicles, not just off-road ones. Any car exposed to harsh elements can benefit from the added protection against rust and corrosion.

3. Undercoating is a one-time treatment: Undercoating is not a one-time treatment. Over time, the undercoating can wear off, especially in regions with extreme weather conditions or where road salt is used. Regular inspections and reapplication may be necessary to maintain the protective barrier.

4. Undercoating is expensive: The cost of undercoating varies depending on the type of material used and whether you choose to do it yourself or hire a professional. However, the cost of undercoating is minimal compared to potential repair costs caused by rust and corrosion.

5. Undercoating is only for older cars: While older cars are more prone to rust and corrosion, undercoating is beneficial for both new and old vehicles. It helps protect against the damaging effects of moisture, salt, and other corrosive substances, regardless of the age of the car.

Types of Undercoating Materials

1. Rubberized coatings: Rubberized undercoatings are popular due to their durability and flexibility. They provide excellent protection against moisture, salt, and debris. Rubberized coatings also offer sound-dampening properties, reducing road noise.

2. Asphalt-based coatings: Asphalt-based undercoatings are known for their excellent rust and corrosion resistance. They provide a thick, protective layer that adheres well to the metal surfaces. However, asphalt-based coatings can be more challenging to apply and may require professional assistance.

3. Wax-based coatings: Wax-based undercoatings offer a more affordable option and are relatively easy to apply. They provide a protective barrier against moisture and salt. However, wax-based coatings may not be as durable as rubberized or asphalt-based options and may require more frequent reapplication.

Steps to Undercoat Your Car

1. Prepare the vehicle: Thoroughly clean the underside of your car to remove any dirt, debris, or rust. It is crucial to start with a clean surface to ensure proper adhesion of the undercoating material.

2. Choose the undercoating material: Select the type of undercoating material that best suits your needs and climate. Consider factors such as durability, sound-dampening properties, and ease of application.

3. Apply the undercoating: Follow the manufacturer’s instructions for applying the chosen undercoating material. Use a spray gun or brush to apply an even layer to the exposed metal surfaces. Pay close attention to areas prone to rust, such as the wheel wells and chassis.

4. Allow the undercoating to dry: Give the undercoating sufficient time to dry and cure before driving the vehicle. This ensures proper adhesion and effectiveness of the protective barrier.

5. Inspect and maintain: Regularly inspect the undercoating for any signs of wear or damage. Touch up or reapply the undercoating as necessary to maintain its protective properties.

When to Undercoat Your Car 

The best time to undercoat your car is before the onset of harsh weather conditions, such as winter or rainy seasons. Applying undercoating in advance ensures that your vehicle is well-protected before it faces the elements. However, undercoating can be done at any time, even on older vehicles, to provide an added layer of protection against rust and corrosion.

How to Choose the Right Undercoating Service

The best time to undercoat your car is before the onset of harsh weather conditions, such as winter or rainy seasons. Applying undercoating in advance ensures that your vehicle is well-protected before it faces the elements. However, undercoating can be done at any time, even on older vehicles, to provide an added layer of protection against rust and corrosion.

DIY vs Professional Undercoating

If you prefer to leave undercoating to the professionals, choosing the right undercoating service is crucial. Consider the following factors when selecting a service provider:

1. Experience and reputation: Look for a service provider with a proven track record and positive reviews from satisfied customers. Experience in undercoating different types of vehicles and knowledge of various undercoating materials are essential.

2. Quality of materials: Ensure that the service provider uses high-quality undercoating materials that offer long-lasting protection against rust and corrosion. Ask about the specific products they use and their effectiveness.

3. Application process: Inquire about the application process used by the service provider. The application should be thorough, covering all exposed metal surfaces, including hard-to-reach areas.

4. Warranty and guarantees: Check if the service provider offers any warranties or guarantees on their undercoating work. A reputable provider should stand behind their work and offer assurance that the undercoating will provide the intended protection.

Deciding between a DIY undercoating or hiring a professional service depends on various factors, such as your level of expertise, available time, and budget. Here are some considerations:

DIY undercoating:

– Pros: Cost-effective, allows customization, can be done at your convenience.

– Cons: Requires proper knowledge and skills, may not provide the same level of protection as professional application, time-consuming.

Professional undercoating:

– Pros: Expert application, use of specialized equipment, provides peace of mind, saves time.

– Cons: Higher cost, limited customization options.

Consider your abilities, resources, and priorities when deciding which approach is best for you.

Conclusion

Auto undercoating emerges as a crucial investment for every car owner. Safeguard your vehicle against corrosion, enhance its longevity, and ensure a smoother ride for years to come. With our ultimate guide, you’re equipped to make informed decisions that protect your automotive investment. Embrace the power of undercoating, and let your car journey withstand the test of time.

Pipe wrap: Everything You Need to Know About Protecting Your Pipes

Pipes are the unsung heroes of our homes and buildings, carrying water, gas, and other essential utilities to every corner. However, these vital components are often out of sight and out of mind until a problem arises. One of the best ways to ensure the longevity and functionality of your pipes is by using pipewrap, a simple yet highly effective solution. In this comprehensive guide, we will delve deep into the world of pipewrap, exploring its importance, types, installation methods, and the benefits it offers. By the end of this article, you’ll have a thorough understanding of how pipewrap can protect your pipes and save you from potential disasters.

What are the benefits of insulation on pipes? 

Using pipe wrap offers a multitude of benefits, making it a wise investment for homeowners and businesses alike:

Prevents Corrosion: Pipewrap acts as a barrier against moisture, preventing corrosion and extending the lifespan of the pipes.

Energy Efficiency: Properly insulated pipes lead to reduced heat loss, improving energy efficiency in heating systems and lowering utility bills.

Prevents Freezing: In cold climates, pipewrap prevents pipes from freezing by providing insulation against low temperatures.

Reduces Condensation: Insulated pipes are less prone to condensation, preventing water damage and mold growth.

Enhances Safety: Insulated pipes are less likely to burst or leak, reducing the risk of water damage and potential accidents.

Saves Money: By preventing pipe damage and increasing energy efficiency, pipe wrap ultimately saves homeowners and businesses money on repairs and utility bills.

Understanding Pipewrap Types is Essential for Property Owners

The growing importance of pipe insulation in modern construction cannot be overstated, especially in an era where energy efficiency and sustainability are paramount. Properly insulated pipes significantly contribute to conserving energy, reducing heat loss, and cutting down utility costs. For property owners, understanding the different types of pipewrap is essential. Each type, whether it’s fiberglass, foam, rubber, aluminum foil, or PVC, offers distinct advantages and is tailored for specific applications. Having a comprehensive knowledge of these materials empowers property owners to make informed choices that align with their specific needs and environmental conditions. By selecting the right pipewrap type, property owners not only protect their investments by ensuring the longevity and functionality of their pipes but also actively contribute to a greener and more energy-efficient future. In a world where environmental consciousness and economic prudence go hand in hand, understanding pipewrap types has become a fundamental aspect of responsible property ownership.

Different Types of Pipe Insulation

Pipewrap, also known as pipe insulation wrap or pipe wrap tape, is a protective covering that shields pipes from external elements. It comes in various types, each designed to cater to specific needs:

Fiberglass Pipewrap: Fiberglass pipewrap is lightweight and offers excellent thermal insulation. It is resistant to moisture, chemicals, and high temperatures, making it suitable for both indoor and outdoor use.

Foam Pipewrap: Foam pipe insulators is easy to install and provides good insulation properties. It is particularly effective in preventing condensation on pipes carrying cold water.

Rubber Pipewrap: Rubber pipewrap is highly flexible and resistant to moisture, making it ideal for pipes in damp or wet environments. It is also durable and can withstand extreme weather conditions.

Aluminum Foil Pipewrap: Aluminum foil pipewrap reflects heat and provides insulation. It is often used in HVAC systems to enhance energy efficiency.

PVC Pipewrap: PVC pipewrap is resistant to chemicals and offers excellent protection against corrosion. It is commonly used in industrial settings where pipes are exposed to harsh substances.

Insulation pipe wrap: A Step-by-Step Guide

Insulation for pipes is a relatively straightforward process that can be done by homeowners or professionals. Here’s a step-by-step guide to help you install pipewrap effectively:

Prepare the Surface: Ensure the pipes are clean and dry before applying insulate pipes. Remove any dirt, rust, or old insulation material.

Measure and Cut: Measure the length of the pipe and cut the pipewrap material accordingly. It’s essential to have a snug fit to maximize insulation effectiveness.

Apply Adhesive (If Required): Some pipewrap materials come with adhesive backing. If your insulating pipes requires adhesive, remove the protective covering and wrap the material tightly around the pipe, pressing firmly to secure it in place.

Overlap Properly: If you are using tape-style pipewrap, ensure that each pipe wrap around overlaps the previous one by at least half its width. This prevents gaps and ensures uniform insulation.

Secure the Ends: Use additional tape or adhesive to secure the ends of the pipewrap, ensuring there are no openings where moisture or air can seep in.

Inspect and Repair: After insulation pipe wrap, inspect the wrapped pipes for any gaps or loose sections. If you find any issues, repair them immediately to maintain the integrity of the insulation.

Troubleshooting Pipewrap Installations: Ensuring a Seamless Shield for Your Pipes

Wrapping pipe insulation can significantly enhance the durability and efficiency of your plumbing system, occasional issues may arise during or after the process. Identifying and addressing these problems promptly is crucial to ensuring your pipes remain well-protected. We will explore common installation mistakes, signs of poorly installed pipewrap, and handy DIY repair tips to troubleshoot any minor problems that might occur.

A. Common Installation Mistakes: How to Avoid Them

  • Incomplete Surface Preparation:

Mistake: Inadequate cleaning before installation can hinder the pipewrap’s adhesion.

Solution: Thoroughly clean and dry the pipes before applying the pipewrap to ensure proper bonding.

  • Incorrect Overlapping:

Mistake: Incorrect overlapping can create gaps in the insulation, reducing its effectiveness.

Solution: Follow the manufacturer’s guidelines regarding overlapping to ensure a snug fit without gaps.

  • Insufficient Adhesive Application:

Mistake: Insufficient adhesive application can lead to loose pipewrap, reducing its protective capabilities.

Solution: Apply adhesive evenly, following the instructions provided, and firmly press the wrap in place for secure adhesion.

B. Signs of Poorly Installed Pipewrap: Identifying Issues Early

  • Visible Gaps or Loose Ends:

Issue: Gaps or loose ends indicate improper installation, compromising insulation.

Solution: Reapply pipewrap to cover gaps and secure loose ends, ensuring a seamless fit.

  • Condensation Buildup:

Issue: Condensation forming on pipes suggests inadequate insulation, allowing temperature fluctuations.

Solution: Reinforce the insulation by adding an extra layer of pipewrap, especially in areas prone to condensation.

  • Deterioration or Mold Growth:

Issue: Deterioration or mold growth under the pipewrap signifies moisture infiltration.

Solution: Remove the damaged section, address the underlying issue causing moisture, and reinstall pipewrap properly.

C. DIY Repair Tips: Fixing Minor Problems with Pipewrap

  • Patchwork Repair:

Issue: Small tears or damages in the pipewrap.

Solution: Use compatible patching material to cover the damaged area, ensuring airtight sealing.

  • Reinforcement with Tape:

Issue: Loose pipewrap or gaps in insulation.

Solution: Use specialized pipewrap tape to reinforce loose sections and seal gaps, enhancing overall insulation.

  • Regular Inspection and Maintenance:

Issue: Potential wear and tear over time.

Solution: Regularly inspect pipewrap for signs of damage, and conduct minor repairs promptly to prevent issues from escalating.

Comparison of Pipe wrap Insulation: Pros and Cons

In the world of pipewrap materials, choosing the right one is pivotal for ensuring the longevity and efficiency of your plumbing system. With options like fiberglass, foam, rubber, aluminum foil, spray pipe insulation, and PVC pipewrap available, it’s essential to understand their pros and cons. In this comprehensive guide, we will delve deep into the strengths and weaknesses of each material, helping you make an informed decision tailored to your specific needs. Additionally, we will explore real-life testimonials, providing firsthand insights into users’ experiences with different pipewrap types.

A. Analyzing Fiberglass, Foam, Rubber, Aluminum Foil, and PVC Pipewrap

1. Fiberglass Pipewrap:

Pros: Lightweight, excellent thermal insulation, resistant to moisture and chemicals.

Cons: Fragile, may require additional protective layer in harsh environments.

2. Foam Pipewrap:

Pros: Easy to install, good insulation properties, effective against condensation.

Cons: Less durable than other materials, may compress over time.

3. Rubber Pipewrap:

Pros: Highly flexible, moisture-resistant, durable, suitable for damp environments.

Cons: Vulnerable to extreme temperatures, may degrade over time.

4. Aluminum Foil Pipewrap:

Pros: Reflects heat, enhances energy efficiency, resistant to moisture.

Cons: Prone to tearing, may require careful handling during installation.

5. PVC Pipewrap:

Pros: Chemical-resistant, protects against corrosion, durable.

Cons: Less flexible than rubber, may crack in very low temperatures.

B. Which Pipe Wrapping Insulation is Ideal for Your Specific Needs?

Choosing the right pipewrap material depends on your unique requirements. For instance, if you’re dealing with a damp environment, rubber pipewrap’s moisture resistance might be invaluable. In areas with extreme temperature fluctuations, fiberglass or foam pipewrap could be preferable due to their excellent thermal insulation properties. Evaluate your specific situation, considering factors like temperature, moisture, and potential wear and tear, to determine the most suitable material for your pipes.

C. Real-Life Testimonials: Users’ Experiences with Different Pipewrap Types

Real-life testimonials provide invaluable insights into the practical aspects of pipewrap materials. Users’ experiences reveal the ease of installation, long-term durability, and ability to withstand varying conditions.

Sarah, a homeowner from New York, shares, “We opted for foam pipewrap, and it made a significant difference in our utility bills. The insulation was easy to install, and even in the freezing winter, our pipes remained warm, preventing any potential issues.”

John, a facilities manager, adds, “In our industrial setting, we found rubber pipewrap to be a lifesaver. Its flexibility allowed us to cover even the most complex pipes, ensuring long-lasting protection against moisture and wear.”

Why Pipe Protection is Crucial: Safeguarding the Lifelines of Your Home

Pipes, the silent heroes of our homes, play a crucial role in our daily lives, ensuring the smooth flow of water, gas, and other essentials. However, these vital conduits often operate unnoticed until a problem arises. Protecting them is not just a matter of convenience; it’s a necessity. The reasons why pipe protection is absolutely crucial, exploring common threats that pipes face and the dire consequences of neglecting their maintenance.

A. Common Threats to Pipes: Corrosion, Physical Damage, and Temperature Fluctuations

1. Corrosion:

Pipes are vulnerable to corrosion, especially in regions with hard water. Over time, this natural process weakens the pipes, leading to leaks and reduced efficiency.

2. Physical Damage:

Whether due to accidental impacts during construction or natural disasters, physical damage can compromise the structural integrity of pipes, making them prone to sudden failures.

3. Temperature Fluctuations:

Extreme temperatures can cause pipes to expand and contract, stressing their materials. This strain can weaken joints and connections, increasing the risk of leaks.

B. Consequences of Neglect: Repair Costs, Water Wastage, and Safety Hazards

1. Repair Costs:

Neglected pipes are a disaster waiting to happen. The longer the issues persist, the more extensive the damage becomes, leading to costly repairs. Timely protection can prevent these expenses.

2. Water Wastage:

Leaking pipes waste an enormous amount of water. In a world facing water scarcity, these precious resources should not be squandered. Protecting pipes prevents unnecessary wastage.

3. Safety Hazards:

Damaged pipes can lead to a variety of safety hazards, including water damage to your property’s structure, electrical issues, and even the growth of hazardous molds. These dangers can be avoided through proactive pipe protection measures.

Environmental Considerations: Eco-Friendly wrap for pipes Solutions

In the realm of environmental considerations and eco-friendly pipe protection solutions, Brodi Pipewrap stands out with its innovative spray-on anti-sweat insulating coating. Designed to address the challenges posed by intricate plumbing installations, this advanced solution goes beyond conventional methods. 

Pipewrap

By preventing condensation buildup, Brodi Pipewrap not only ensures the integrity of the pipes but also contributes significantly to environmental conservation. The spray-on application not only covers even the most complex pipe configurations effectively but also minimizes material wastage, aligning with sustainable practices. In an era where environmental consciousness is paramount, Brodi Pipewrap’s eco-friendly approach not only ensures the durability of plumbing systems but also reflects a commitment to reducing the overall environmental impact of pipe protection methods.

Conclusion

In conclusion, pipewrap is a cost-effective and practical solution for protecting your pipes from various threats. Whether you are a homeowner, a business owner, or an industrial manager, investing in high-quality pipewrap can safeguard your infrastructure, enhance efficiency, and save you money in the long run. By understanding the types of pipewrap available, the installation process, and the benefits it offers, you can make an informed decision to ensure the longevity and functionality of your pipes. Don’t wait for a pipe disaster to strike; take proactive measures today and wrap your pipes for a secure and worry-free future.

How to protect surfaces from salt water corrosion after the ice melts

excessive salt after snow and ice melting

Winter weather is harsh, but it’s not just the cold that you need to look out for. With the onslaught of snow and ice also comes other dangers that can remain even after the ice has melted away. If you’re a homeowner or a business owner, then protecting your property is likely a top priority. Unfortunately, winter can cause serious damage to some of your most expensive possessions including your vehicles or home.

However, by adopting a solid plan for protecting your home, vehicles and business equipment in the winter, you can save yourself the need for many costly repairs. In this article, we’ll be talking about ways that you can stop winter corrosion and other damage in its tracks.

Continue reading How to protect surfaces from salt water corrosion after the ice melts

Removing hard packed snow and ice with a cost effective liquid de-icer

Snow and ice builds up on entrance, sidewalks and driveways around buildings

Winter can be a magical time. Children playing in the snow, families reuniting over the holidays, friends gathering around cozy fireplaces. Of course, along with the colder temperatures comes the sometimes perilous and unpredictable winter weather and piles of snow and ice that never seem to disappear.

If you own a residential property or manage a commercial property, you know how important and difficult it is to keep walkways, entranceways, driveways and sidewalks clear and safe in these conditions. With so many options for granular and liquid de-icers on the market, what’s the best way to remove hard-packed snow and ice?

Continue reading Removing hard packed snow and ice with a cost effective liquid de-icer

Preparing your business for Winter

Winter maintenance for winter business


It seems that the winter season is upon us and as they say, it’s “the most wonderful time of the year”. The snowmaking a beautiful white blanket over our roads and sidewalks, winter storms, cosy fires and quality time indoors, this winter season is bound to be a great one. That is of course if you make sure to keep up on your de-icing. The worst part about this season is how icy and slippery everything can get, and how potentially dangerous that ice can be. However, fear not, because we here at Brodi have a comprehensive guide on how to survive winter, how to get through the treacherous snow and ice. So that you can enjoy all the best parts of winter without having to worry about the dangers.

Continue reading Preparing your business for Winter

Instant de-icer spray – the best to keep windshields from icing up

keep windshield from icing up, using the instant spray deicer Well, it looks like the winter weather is right around the corner. Soon, we’ll have gorgeous white ice and snow-draped all over our respective cities and towns, bringing a brilliant white sheen to the world. Not only do we get beautiful snow, we also get Christmas, cozy fires, skiing and snowmobiles. However, with all these cool and great activities come some hardships– namely, scraping ice that’s covering your windshield. One of the biggest pains in the morning before you have to go to work, this would definitely be the worst part of any winter day. But is there a way to make this process easier? Yes, there is.

Continue reading Instant de-icer spray – the best to keep windshields from icing up