Category Archives: Facility Maintenance Solutions

Revolutionizing Grease Trap Maintenance: Unleashing the Power of Bac-Treet vs. Manual Bacterial Treatment

Are you tired of dealing with clogged drains and foul odors caused by grease buildup in your grease trap? We have the perfect solution for you! 

Introducing Bac-Treet, the revolutionary bacterial treatment specifically designed to revolutionize grease trap maintenance. With its powerful and efficient formula, Bac-Treet is set to transform the way grease traps are maintained, leaving no trace of grease buildup behind.

Revolutionizing Grease Trap Maintenance

Unlike manual bacterial treatments, Bac-Treet utilizes a highly active blend of specially selected microbes that quickly break down fats, oils, and grease (FOG) in your grease trap. This cutting-edge technology ensures that your grease trap remains clean and odor-free, preventing costly blockages and potential health hazards.

Bac-Treet is easy to use, requiring no special equipment or training. Simply add the treatment directly into your grease trap, and let the powerful bacteria work their magic. Experience the power of ATC Bac-Treet and wave goodbye to grease trap maintenance headaches forever. Say hello to a clean and efficient grease trap with Bac-Treet. Try it today and see the difference for yourself.

Understanding The Limitations of Manual Bacterial Treatment

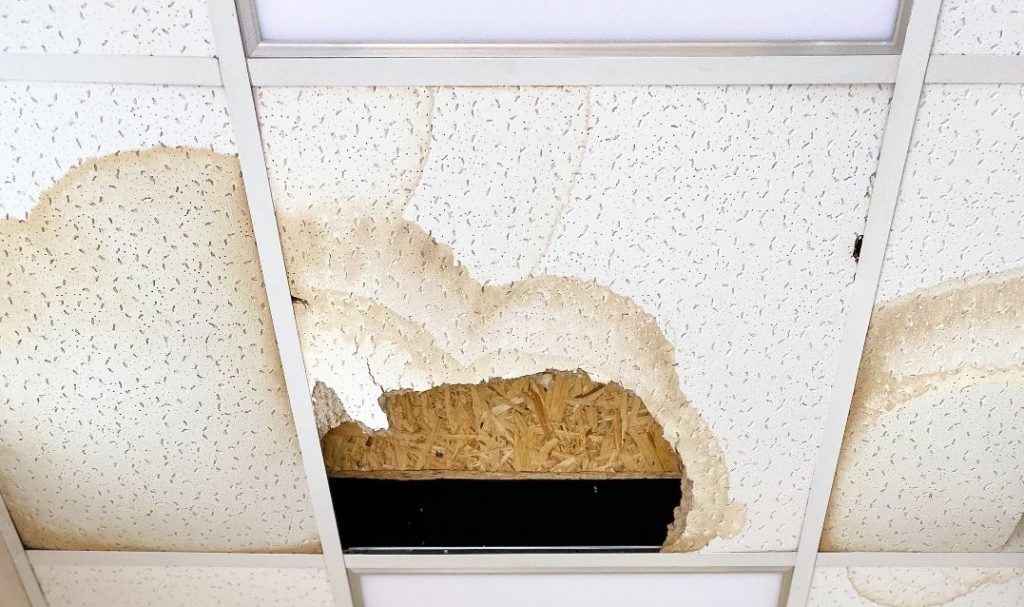
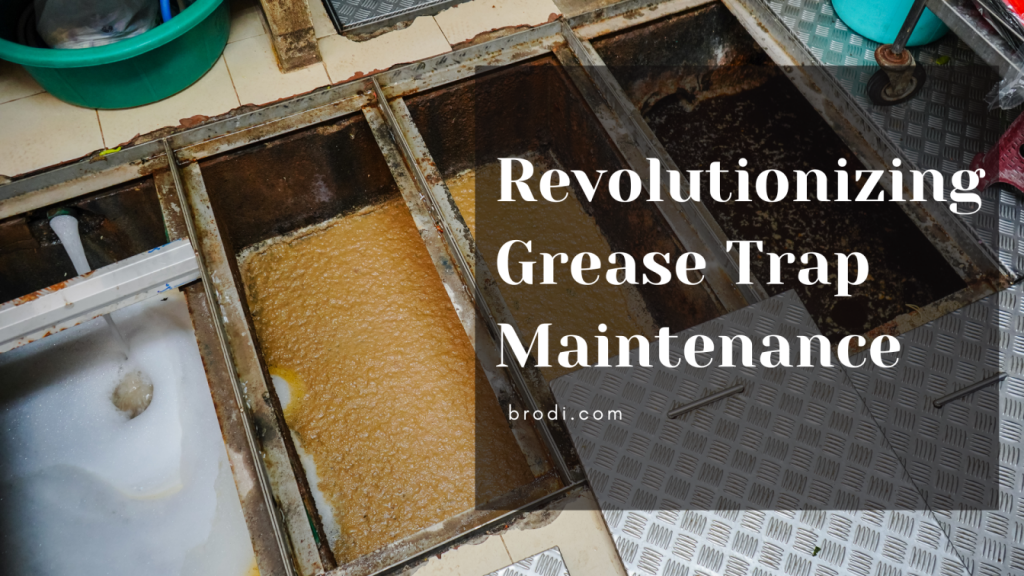
Maintaining a clean and efficient grease trap is essential for any establishment that deals with grease and oil on a regular basis. Grease traps are designed to capture and separate fats, oils, and grease from wastewater, preventing them from entering the sewage system and causing blockages. However, over time, grease can accumulate in the trap, leading to clogged drains, foul odors, and potential health hazards.

Proper maintenance of grease traps ensures that they function effectively, preventing costly repairs and disruptions to your business. Regularly cleaning and treating your grease trap not only extends its lifespan but also helps maintain a hygienic and odor-free environment. Neglecting grease trap maintenance can result in expensive plumbing repairs, fines from regulatory authorities, and a negative impact on your business’s reputation.

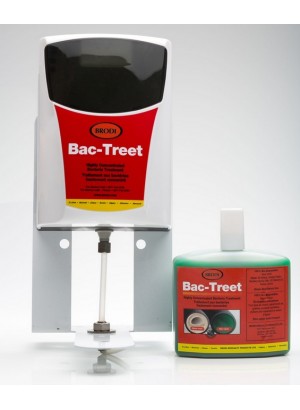
Introducing The Bac-Treet Starter Pack and Its Benefits

Traditional manual bacterial treatments have long been used to break down grease in grease traps. These treatments typically involve adding bacteria or enzymes to the grease trap, hoping that they will digest the fats, oils, and grease over time. While manual treatments can be effective to some extent, they often have limitations that can hinder their overall performance.

One of the main limitations of manual bacterial treatments is the lack of control over the types and quantities of bacteria introduced into the grease trap. Different bacteria have varying capabilities to break down grease, and using the wrong strains or insufficient quantities may result in suboptimal performance. Additionally, manual treatments may require frequent reapplications to maintain effectiveness, leading to additional costs and effort.

Another drawback of manual treatments is the time it takes for the bacteria to break down the grease. Manual treatments often require extended periods of time to fully digest the fats, oils, and grease in the trap, leaving room for potential buildup and blockages. This can lead to unpleasant odors, clogged drains, and increased maintenance requirements.

How Bac-Treet Revolutionizes Grease Trap Maintenance

Bac-Treet Starter Pack is a game-changer in grease trap maintenance. Unlike traditional manual bacterial treatments, Bac-Treet utilizes a highly active blend of specially selected microbes that are specifically designed to target and break down fats, oils, and grease in grease traps. This advanced formula ensures rapid and efficient digestion of grease, eliminating the need for prolonged treatment periods.

The key benefit of Bac-Treet is its ability to prevent grease buildup and minimize the risk of clogged drains and foul odors. By introducing powerful bacteria into the grease trap, Bac-Treet quickly breaks down even the toughest grease deposits, leaving your grease trap clean and odor-free. This not only improves the overall functionality of the grease trap but also enhances the hygiene and cleanliness of your establishment.

Another advantage of Bac-Treet is its ease of use. Unlike manual bacterial treatments that may require specialized equipment or training, Bac-Treet can be easily applied directly into the grease trap. Simply follow the instructions provided, and let the powerful bacteria do their work. This simplicity saves you time and effort, allowing you to focus on other aspects of your business.

Step-by-step Guide to Using Bac-Treet for Grease Trap Maintenance

Using Bac-Treet for grease trap maintenance is simple and straightforward. Follow these step-by-step instructions to ensure optimal results:

Installation: Open the BAC TREET device and insert the provided batteries. Securely place the unit in proximity to the grease trap or drainage area.

Feeder Hoses: Route and install feeder hoses as per directions. 

Activation: Turn on the device and set the frequency required. activate the bacterial treatment. The system will release a controlled dose of bacteria into the grease trap at regular intervals.

Routine Maintenance: For optimal results, maintain a consistent treatment schedule based on the manufacturer’s recommendations. Regular use ensures continuous bacterial activity.

Monitoring: Monitor the device’s indicator lights to track battery life and bacterial treatment levels. Replace batteries as needed, and refill the bacterial solution according to the product guidelines.

Refill Process: When the bacterial solution is depleted, follow the easy refill process provided with the BAC TREET Starter Pack. This typically involves adding a new bacterial cartridge or solution container.

By following these simple steps, you can effectively maintain your grease trap and experience the full benefits of ATC Bac-Treet.

Comparing The Costs and Effectiveness of Manual Bacterial Treatment VS. Bac-Treet

When considering grease trap maintenance options, it is important to compare the costs and effectiveness of manual bacterial treatment and Bac-Treet. While manual treatments may initially seem more affordable, the long-term costs and benefits need to be taken into account.

Manual treatments often require frequent reapplications to maintain effectiveness. This can lead to additional costs in terms of purchasing bacterial products and investing time in the application process. Additionally, the extended treatment periods of manual treatments may result in increased maintenance requirements and potential business disruptions.

On the other hand, Bac-Treet offers a cost-effective and efficient solution. The powerful formula of Bac-Treet ensures rapid and thorough grease digestion, reducing the need for frequent reapplications. This saves you time, effort, and money in the long run. Furthermore, the prevention of clogged drains and foul odors through the use of Bac-Treet minimizes the risk of costly plumbing repairs and potential fines.

When considering the overall effectiveness and cost-efficiency, Bac-Treet proves to be a superior choice for grease trap maintenance.

Ready to experience the power of Bac-Treet for yourself? You can purchase Bac-Treet by clicking here

Benefits of Wax Coating: Enhancing your Snow Removal Equipment

Are you tired of snow sticking to your snow removal equipment and slowing you down? If so, it’s time to consider the benefits of wax coating for enhancing your equipment’s performance. Wax coating, a popular choice among professionals, not only makes your tools look sleek and professional but also improves their functionality in snowy conditions.

When applied to your snow shovels, plows, or blowers, wax coating forms a protective layer that helps prevent snow from sticking to the surface. This means you can remove snow more efficiently, saving time and effort. Additionally, the slick surface created by wax coating allows the equipment to glide smoothly over the snow, reducing resistance and making the whole process easier.

Not only does wax coating enhance your snow removal equipment’s performance, but it also helps extend its lifespan. By protecting your tools from rust and corrosion, the coating ensures they remain in top condition, capable of tackling even the harshest winter weather.

Investing in wax coating for your snow removal equipment can make a significant difference in your snow removal efficiency and the overall maintenance of your tools. So why wait? Get your equipment coated today and experience the benefits for yourself.

Advantages of Wax Coating for Snow Removal Equipment

Snow removal can be a challenging task, especially when the snow sticks to your equipment, making it difficult to clear the way effectively. This is where wax coating comes in handy. When applied to your snow shovels, plows, or blowers, wax coating forms a protective layer that helps prevent snow from sticking to the surface.

The primary advantage of wax coating is that it allows you to remove snow more efficiently, saving time and effort. The slippery nature of the wax coating ensures that the snow slides off easily, without getting clogged on the surface of your equipment. This means you can clear larger areas in a shorter amount of time, increasing your overall productivity.

Additionally, the slick surface created by wax coating allows the equipment to glide smoothly over the snow, reducing resistance and making the whole process easier. You’ll experience less strain on your arms and back, resulting in a more comfortable snow removal experience.

How Wax Coating Enhances Performance and Durability

Not only does wax coating enhance your snow removal equipment’s performance, but it also helps extend its lifespan. By protecting your tools from rust and corrosion, the coating ensures they remain in top condition, capable of tackling even the harshest winter weather.

Snow and ice can cause damage to your equipment, leading to costly repairs or replacements. Wax coating acts as a barrier, preventing moisture from seeping into the metal components and causing rust. The coating also protects against salt and other corrosive substances commonly used in winter road maintenance.

Moreover, wax coating provides a layer of insulation, reducing the risk of freezing and further damage to your snow removal equipment. This added protection ensures that your tools remain reliable and effective throughout the winter season, saving you money in the long run.

Protection Against Corrosion and Rust With Wax Coating

One of the biggest concerns when it comes to snow removal equipment is the potential for corrosion and rust. Winter weather conditions, combined with exposure to moisture and salt, can quickly deteriorate the metal components of your tools. However, with the application of wax coating, you can significantly reduce the risk of corrosion and rust.

Wax coating forms a protective barrier on the surface of your equipment, preventing moisture from coming into direct contact with the metal. This barrier inhibits the oxidation process that leads to rust formation. By keeping your snow removal equipment rust-free, you can ensure its optimal performance and longevity.

Furthermore, wax coating also protects against the corrosive effects of salt and other de-icing chemicals. These substances can cause significant damage to your tools if left untreated. The wax coating acts as a shield, preventing the salt from penetrating the metal and causing corrosion.

Increased Efficiency and Reduced Maintenance With Wax Coating

Snow removal can be a time-consuming and physically demanding task. However, with wax coating, you can significantly increase your efficiency and reduce the effort required to clear snow.

The slick surface created by wax coating allows your equipment to glide smoothly over the snow, minimizing resistance. This means you can clear snow more quickly and effortlessly, resulting in improved productivity.

Additionally, the reduced friction provided by wax coating helps prevent snow from sticking to the surface of your tools. This means you won’t have to constantly stop and clean off the snow, saving you valuable time during the snow removal process.

Moreover, the wax coating reduces the buildup of ice on your equipment, further enhancing its efficiency. The slippery surface prevents ice from forming and accumulating, allowing you to continue working without interruption.

With wax coating, you’ll also experience reduced maintenance requirements for your snow removal equipment. The protective layer provided by the coating helps repel dirt, debris, and other contaminants, keeping your tools cleaner for longer. This means less time spent on regular cleaning and maintenance, allowing you to focus on the task at hand.

Longevity and Cost-Effectiveness of Wax Coating

Investing in wax coating for your snow removal equipment can make a significant difference in its longevity and overall cost-effectiveness. By protecting your tools from rust and corrosion, the coating ensures they remain in top condition, capable of tackling even the harshest winter weather.

Snow removal equipment is a significant investment, and it’s essential to maximize its lifespan. Wax coating acts as a barrier, preventing moisture and corrosive substances from damaging the metal components. This added protection extends the life of your tools, reducing the need for frequent repairs or replacements.

Moreover, the cost-effectiveness of wax coating lies in its ability to enhance the efficiency of your snow removal equipment. By reducing resistance and preventing snow from sticking, you can clear larger areas in less time, ultimately saving on labor costs.

Additionally, the reduced maintenance requirements for wax-coated equipment result in further cost savings. With less time spent on cleaning and upkeep, you can allocate resources to other areas of your snow removal operation.

Steps to Apply Wax Coating to Snow Removal Equipment

Applying wax coating to your snow removal equipment is a straightforward process that can yield significant benefits. Here are the basic steps to follow:

1. Clean the equipment: Before applying wax coating, ensure that your tools are clean and free from dirt, debris, and rust. Use a mild detergent and water to thoroughly clean the surfaces, and allow them to dry completely.

2. Choose the right wax coating: There are various types of wax coatings available, each designed for specific materials and applications. Consider the type of snow removal equipment you have and select a wax coating that is suitable for its surface.

3. Apply the wax coating: Follow the manufacturer’s instructions for applying the wax coating. Generally, this involves using a sponge or cloth to evenly spread the wax over the surfaces of your equipment. Allow the coating to dry completely before using the tools.

4. Maintain the wax coating: To ensure the longevity of the wax coating, it’s essential to regularly inspect and maintain your snow removal equipment. Check for any signs of wear or damage to the coating, and reapply as necessary.

Types of Wax Coatings for Different Snow Removal Equipment

There are various types of wax coatings available, each designed to suit different types of snow removal equipment. Here are some common types of wax coatings:

1. Carnauba wax: Carnauba wax is a natural wax derived from the leaves of the carnauba palm tree. It is known for its durability and high melting point, making it suitable for heavy-duty snow removal equipment.

2. Polymer-based wax: Polymer-based wax coatings provide excellent protection against rust and corrosion. They are often used for smaller snow removal tools, such as shovels and blowers.

3. Silicone wax: An exclusive fusion of silicone and wax coating creates a smooth, non-adhesive layer, effectively warding off the adherence of ice and snow to plows, shovels, and other snow removal equipment.

4. Synthetic wax: Synthetic waxes are formulated to offer long-lasting protection and enhanced performance. They are ideal for larger snow removal equipment, such as plows and snow blowers.

5. Clearcoat wax: Clearcoat wax is a transparent wax coating that provides a glossy finish while protecting your equipment from the elements. It can be used on various types of snow removal tools.

When selecting a wax coating for your snow removal equipment, consider the specific requirements of your tools and the type of snow conditions you typically encounter. Consult with a professional or the manufacturer of the wax coating for expert advice.

Maintenance Tips for Snow Removal Equipment with Wax Coating

To ensure the longevity and optimal performance of your snow removal equipment with wax coating, it’s essential to follow proper maintenance practices. Here are some tips to keep in mind:

1. Regularly inspect your equipment for any signs of wear or damage to the wax coating. If you notice any areas where the coating has worn off, reapply the wax to ensure continued protection.

2. After each use, clean your equipment thoroughly to remove any dirt, debris, or salt residue that may have accumulated. Use a mild detergent and water to clean the surfaces, and dry them thoroughly to prevent moisture buildup.

3. Avoid exposing your wax-coated equipment to extreme temperatures or harsh weather conditions when not in use. Store your tools in a dry and protected environment to prevent damage to the wax coating.

4. If you notice any signs of rust or corrosion on your equipment, take immediate action to address the issue. Use a rust remover or a wire brush to remove any rust spots, and reapply the wax coating to protect against further damage.

By following these maintenance tips, you can ensure that your snow removal equipment remains in top condition, providing reliable performance throughout the winter season.

The Ultimate Guide to Auto Undercoating: Why It’s Essential for Every Car Owner

As a responsible car owner, keeping your vehicle in top-notch condition should be a top priority. One important aspect of car maintenance that often gets overlooked is auto undercoating. This ultimate guide will shed light on why auto undercoating is essential and why every car owner should consider it.

Auto undercoating serves as a protective layer between your car’s body and the road. It shields your vehicle from various elements such as moisture, salt, gravel, and other debris that can cause rust and corrosion. By preventing these damaging elements from reaching the vulnerable areas of your car, undercoating can significantly extend the life of your vehicle.

Not only does undercoating protect against corrosion, but it also helps reduce road noise and vibrations, making for a smoother and quieter ride. Additionally, it can act as an added layer of insulation, helping to keep your car’s interior cooler during the hot summer months and warmer during the winter.

In this comprehensive guide, we will explore the different types of undercoating, the benefits they offer, and the best practices for applying undercoating to your car. Don’t neglect this important step in car maintenance. Read on to discover why auto undercoating is essential for every car owner.

The Importance of Auto Undercoating

Auto undercoating refers to the process of applying a protective coating to the underside of a car. It involves spraying a layer of specialized material onto the exposed metal surfaces, such as the chassis, floor pans, and wheel wells. This coating acts as a barrier that prevents moisture, salt, and other corrosive substances from coming into direct contact with the metal, reducing the risk of rust and corrosion.

Undercoating can be done using various materials, including rubberized coatings, asphalt-based coatings, and wax-based coatings. The choice of undercoating material depends on factors such as the climate in which you live, the type of driving you do, and personal preference.

Benefits of Auto Undercoating

Auto undercoating is crucial for maintaining the structural integrity and longevity of your car. The underside of a vehicle is constantly exposed to harsh elements, such as road salt, gravel, and moisture. Over time, these elements can cause corrosion, leading to rust and deterioration of the metal components.

By applying an undercoating, you create a protective barrier that prevents these elements from reaching the vulnerable areas of your car. This significantly reduces the risk of rust and corrosion, prolonging the lifespan of your vehicle.

Furthermore, undercoating helps to reduce road noise and vibrations. The coating acts as a sound-dampening barrier, absorbing the noise generated by the tires and the road surface. This results in a quieter and more comfortable ride, especially on rough roads or highways.

Additionally, undercoating can provide insulation benefits. It helps to keep your car’s interior cooler during hot summer months by reflecting heat away from the underside of the vehicle. In colder climates, undercoating acts as an added layer of insulation, helping to retain heat and keep the interior warmer.

1. Corrosion Prevention with Proflex: One of the key advantages of utilizing auto undercoating, particularly with products like Proflex, is its effective corrosion protection. By establishing a protective barrier that shields the vehicle’s metal surfaces from corrosive elements, Proflex undercoating markedly diminishes the likelihood of rust and deterioration.

2. Extended lifespan: With proper undercoating, you can significantly extend the lifespan of your vehicle. By preventing rust and corrosion, you ensure that the structural integrity of your car remains intact, allowing it to withstand the test of time.

3. Reduced maintenance costs: Rust and corrosion can lead to costly repairs and replacements. By investing in undercoating, you can minimize the need for expensive repairs, saving you money in the long run.

4. Improved resale value: A well-maintained car with a solid undercoating can fetch a higher resale value. Prospective buyers will appreciate the added protection against rust and corrosion, making your vehicle more desirable in the used car market.

5. Enhanced driving experience: Undercoating helps to reduce road noise and vibrations, resulting in a smoother and quieter ride. This can make your driving experience more enjoyable, especially on long trips or rough roads.

Common Misconceptions about Auto Undercoating

1. New cars don’t need undercoating: While new cars often come with some form of factory undercoating, it may not provide sufficient protection in certain climates or driving conditions. Adding an additional layer of undercoating can provide extra protection and peace of mind.

2. Undercoating is only for off-road vehicles: Undercoating is beneficial for all types of vehicles, not just off-road ones. Any car exposed to harsh elements can benefit from the added protection against rust and corrosion.

3. Undercoating is a one-time treatment: Undercoating is not a one-time treatment. Over time, the undercoating can wear off, especially in regions with extreme weather conditions or where road salt is used. Regular inspections and reapplication may be necessary to maintain the protective barrier.

4. Undercoating is expensive: The cost of undercoating varies depending on the type of material used and whether you choose to do it yourself or hire a professional. However, the cost of undercoating is minimal compared to potential repair costs caused by rust and corrosion.

5. Undercoating is only for older cars: While older cars are more prone to rust and corrosion, undercoating is beneficial for both new and old vehicles. It helps protect against the damaging effects of moisture, salt, and other corrosive substances, regardless of the age of the car.

Types of Undercoating Materials

1. Rubberized coatings: Rubberized undercoatings are popular due to their durability and flexibility. They provide excellent protection against moisture, salt, and debris. Rubberized coatings also offer sound-dampening properties, reducing road noise.

2. Asphalt-based coatings: Asphalt-based undercoatings are known for their excellent rust and corrosion resistance. They provide a thick, protective layer that adheres well to the metal surfaces. However, asphalt-based coatings can be more challenging to apply and may require professional assistance.

3. Wax-based coatings: Wax-based undercoatings offer a more affordable option and are relatively easy to apply. They provide a protective barrier against moisture and salt. However, wax-based coatings may not be as durable as rubberized or asphalt-based options and may require more frequent reapplication.

Steps to Undercoat Your Car

1. Prepare the vehicle: Thoroughly clean the underside of your car to remove any dirt, debris, or rust. It is crucial to start with a clean surface to ensure proper adhesion of the undercoating material.

2. Choose the undercoating material: Select the type of undercoating material that best suits your needs and climate. Consider factors such as durability, sound-dampening properties, and ease of application.

3. Apply the undercoating: Follow the manufacturer’s instructions for applying the chosen undercoating material. Use a spray gun or brush to apply an even layer to the exposed metal surfaces. Pay close attention to areas prone to rust, such as the wheel wells and chassis.

4. Allow the undercoating to dry: Give the undercoating sufficient time to dry and cure before driving the vehicle. This ensures proper adhesion and effectiveness of the protective barrier.

5. Inspect and maintain: Regularly inspect the undercoating for any signs of wear or damage. Touch up or reapply the undercoating as necessary to maintain its protective properties.

When to Undercoat Your Car 

The best time to undercoat your car is before the onset of harsh weather conditions, such as winter or rainy seasons. Applying undercoating in advance ensures that your vehicle is well-protected before it faces the elements. However, undercoating can be done at any time, even on older vehicles, to provide an added layer of protection against rust and corrosion.

How to Choose the Right Undercoating Service

The best time to undercoat your car is before the onset of harsh weather conditions, such as winter or rainy seasons. Applying undercoating in advance ensures that your vehicle is well-protected before it faces the elements. However, undercoating can be done at any time, even on older vehicles, to provide an added layer of protection against rust and corrosion.

DIY vs Professional Undercoating

If you prefer to leave undercoating to the professionals, choosing the right undercoating service is crucial. Consider the following factors when selecting a service provider:

1. Experience and reputation: Look for a service provider with a proven track record and positive reviews from satisfied customers. Experience in undercoating different types of vehicles and knowledge of various undercoating materials are essential.

2. Quality of materials: Ensure that the service provider uses high-quality undercoating materials that offer long-lasting protection against rust and corrosion. Ask about the specific products they use and their effectiveness.

3. Application process: Inquire about the application process used by the service provider. The application should be thorough, covering all exposed metal surfaces, including hard-to-reach areas.

4. Warranty and guarantees: Check if the service provider offers any warranties or guarantees on their undercoating work. A reputable provider should stand behind their work and offer assurance that the undercoating will provide the intended protection.

Deciding between a DIY undercoating or hiring a professional service depends on various factors, such as your level of expertise, available time, and budget. Here are some considerations:

DIY undercoating:

– Pros: Cost-effective, allows customization, can be done at your convenience.

– Cons: Requires proper knowledge and skills, may not provide the same level of protection as professional application, time-consuming.

Professional undercoating:

– Pros: Expert application, use of specialized equipment, provides peace of mind, saves time.

– Cons: Higher cost, limited customization options.

Consider your abilities, resources, and priorities when deciding which approach is best for you.

Conclusion

Auto undercoating emerges as a crucial investment for every car owner. Safeguard your vehicle against corrosion, enhance its longevity, and ensure a smoother ride for years to come. With our ultimate guide, you’re equipped to make informed decisions that protect your automotive investment. Embrace the power of undercoating, and let your car journey withstand the test of time.

Pipe wrap: Everything You Need to Know About Protecting Your Pipes

Pipes are the unsung heroes of our homes and buildings, carrying water, gas, and other essential utilities to every corner. However, these vital components are often out of sight and out of mind until a problem arises. One of the best ways to ensure the longevity and functionality of your pipes is by using pipewrap, a simple yet highly effective solution. In this comprehensive guide, we will delve deep into the world of pipewrap, exploring its importance, types, installation methods, and the benefits it offers. By the end of this article, you’ll have a thorough understanding of how pipewrap can protect your pipes and save you from potential disasters.

What are the benefits of insulation on pipes? 

Using pipe wrap offers a multitude of benefits, making it a wise investment for homeowners and businesses alike:

Prevents Corrosion: Pipewrap acts as a barrier against moisture, preventing corrosion and extending the lifespan of the pipes.

Energy Efficiency: Properly insulated pipes lead to reduced heat loss, improving energy efficiency in heating systems and lowering utility bills.

Prevents Freezing: In cold climates, pipewrap prevents pipes from freezing by providing insulation against low temperatures.

Reduces Condensation: Insulated pipes are less prone to condensation, preventing water damage and mold growth.

Enhances Safety: Insulated pipes are less likely to burst or leak, reducing the risk of water damage and potential accidents.

Saves Money: By preventing pipe damage and increasing energy efficiency, pipe wrap ultimately saves homeowners and businesses money on repairs and utility bills.

Understanding Pipewrap Types is Essential for Property Owners

The growing importance of pipe insulation in modern construction cannot be overstated, especially in an era where energy efficiency and sustainability are paramount. Properly insulated pipes significantly contribute to conserving energy, reducing heat loss, and cutting down utility costs. For property owners, understanding the different types of pipewrap is essential. Each type, whether it’s fiberglass, foam, rubber, aluminum foil, or PVC, offers distinct advantages and is tailored for specific applications. Having a comprehensive knowledge of these materials empowers property owners to make informed choices that align with their specific needs and environmental conditions. By selecting the right pipewrap type, property owners not only protect their investments by ensuring the longevity and functionality of their pipes but also actively contribute to a greener and more energy-efficient future. In a world where environmental consciousness and economic prudence go hand in hand, understanding pipewrap types has become a fundamental aspect of responsible property ownership.

Different Types of Pipe Insulation

Pipewrap, also known as pipe insulation wrap or pipe wrap tape, is a protective covering that shields pipes from external elements. It comes in various types, each designed to cater to specific needs:

Fiberglass Pipewrap: Fiberglass pipewrap is lightweight and offers excellent thermal insulation. It is resistant to moisture, chemicals, and high temperatures, making it suitable for both indoor and outdoor use.

Foam Pipewrap: Foam pipe insulators is easy to install and provides good insulation properties. It is particularly effective in preventing condensation on pipes carrying cold water.

Rubber Pipewrap: Rubber pipewrap is highly flexible and resistant to moisture, making it ideal for pipes in damp or wet environments. It is also durable and can withstand extreme weather conditions.

Aluminum Foil Pipewrap: Aluminum foil pipewrap reflects heat and provides insulation. It is often used in HVAC systems to enhance energy efficiency.

PVC Pipewrap: PVC pipewrap is resistant to chemicals and offers excellent protection against corrosion. It is commonly used in industrial settings where pipes are exposed to harsh substances.

Insulation pipe wrap: A Step-by-Step Guide

Insulation for pipes is a relatively straightforward process that can be done by homeowners or professionals. Here’s a step-by-step guide to help you install pipewrap effectively:

Prepare the Surface: Ensure the pipes are clean and dry before applying insulate pipes. Remove any dirt, rust, or old insulation material.

Measure and Cut: Measure the length of the pipe and cut the pipewrap material accordingly. It’s essential to have a snug fit to maximize insulation effectiveness.

Apply Adhesive (If Required): Some pipewrap materials come with adhesive backing. If your insulating pipes requires adhesive, remove the protective covering and wrap the material tightly around the pipe, pressing firmly to secure it in place.

Overlap Properly: If you are using tape-style pipewrap, ensure that each pipe wrap around overlaps the previous one by at least half its width. This prevents gaps and ensures uniform insulation.

Secure the Ends: Use additional tape or adhesive to secure the ends of the pipewrap, ensuring there are no openings where moisture or air can seep in.

Inspect and Repair: After insulation pipe wrap, inspect the wrapped pipes for any gaps or loose sections. If you find any issues, repair them immediately to maintain the integrity of the insulation.

Troubleshooting Pipewrap Installations: Ensuring a Seamless Shield for Your Pipes

Wrapping pipe insulation can significantly enhance the durability and efficiency of your plumbing system, occasional issues may arise during or after the process. Identifying and addressing these problems promptly is crucial to ensuring your pipes remain well-protected. We will explore common installation mistakes, signs of poorly installed pipewrap, and handy DIY repair tips to troubleshoot any minor problems that might occur.

A. Common Installation Mistakes: How to Avoid Them

  • Incomplete Surface Preparation:

Mistake: Inadequate cleaning before installation can hinder the pipewrap’s adhesion.

Solution: Thoroughly clean and dry the pipes before applying the pipewrap to ensure proper bonding.

  • Incorrect Overlapping:

Mistake: Incorrect overlapping can create gaps in the insulation, reducing its effectiveness.

Solution: Follow the manufacturer’s guidelines regarding overlapping to ensure a snug fit without gaps.

  • Insufficient Adhesive Application:

Mistake: Insufficient adhesive application can lead to loose pipewrap, reducing its protective capabilities.

Solution: Apply adhesive evenly, following the instructions provided, and firmly press the wrap in place for secure adhesion.

B. Signs of Poorly Installed Pipewrap: Identifying Issues Early

  • Visible Gaps or Loose Ends:

Issue: Gaps or loose ends indicate improper installation, compromising insulation.

Solution: Reapply pipewrap to cover gaps and secure loose ends, ensuring a seamless fit.

  • Condensation Buildup:

Issue: Condensation forming on pipes suggests inadequate insulation, allowing temperature fluctuations.

Solution: Reinforce the insulation by adding an extra layer of pipewrap, especially in areas prone to condensation.

  • Deterioration or Mold Growth:

Issue: Deterioration or mold growth under the pipewrap signifies moisture infiltration.

Solution: Remove the damaged section, address the underlying issue causing moisture, and reinstall pipewrap properly.

C. DIY Repair Tips: Fixing Minor Problems with Pipewrap

  • Patchwork Repair:

Issue: Small tears or damages in the pipewrap.

Solution: Use compatible patching material to cover the damaged area, ensuring airtight sealing.

  • Reinforcement with Tape:

Issue: Loose pipewrap or gaps in insulation.

Solution: Use specialized pipewrap tape to reinforce loose sections and seal gaps, enhancing overall insulation.

  • Regular Inspection and Maintenance:

Issue: Potential wear and tear over time.

Solution: Regularly inspect pipewrap for signs of damage, and conduct minor repairs promptly to prevent issues from escalating.

Comparison of Pipe wrap Insulation: Pros and Cons

In the world of pipewrap materials, choosing the right one is pivotal for ensuring the longevity and efficiency of your plumbing system. With options like fiberglass, foam, rubber, aluminum foil, spray pipe insulation, and PVC pipewrap available, it’s essential to understand their pros and cons. In this comprehensive guide, we will delve deep into the strengths and weaknesses of each material, helping you make an informed decision tailored to your specific needs. Additionally, we will explore real-life testimonials, providing firsthand insights into users’ experiences with different pipewrap types.

A. Analyzing Fiberglass, Foam, Rubber, Aluminum Foil, and PVC Pipewrap

1. Fiberglass Pipewrap:

Pros: Lightweight, excellent thermal insulation, resistant to moisture and chemicals.

Cons: Fragile, may require additional protective layer in harsh environments.

2. Foam Pipewrap:

Pros: Easy to install, good insulation properties, effective against condensation.

Cons: Less durable than other materials, may compress over time.

3. Rubber Pipewrap:

Pros: Highly flexible, moisture-resistant, durable, suitable for damp environments.

Cons: Vulnerable to extreme temperatures, may degrade over time.

4. Aluminum Foil Pipewrap:

Pros: Reflects heat, enhances energy efficiency, resistant to moisture.

Cons: Prone to tearing, may require careful handling during installation.

5. PVC Pipewrap:

Pros: Chemical-resistant, protects against corrosion, durable.

Cons: Less flexible than rubber, may crack in very low temperatures.

B. Which Pipe Wrapping Insulation is Ideal for Your Specific Needs?

Choosing the right pipewrap material depends on your unique requirements. For instance, if you’re dealing with a damp environment, rubber pipewrap’s moisture resistance might be invaluable. In areas with extreme temperature fluctuations, fiberglass or foam pipewrap could be preferable due to their excellent thermal insulation properties. Evaluate your specific situation, considering factors like temperature, moisture, and potential wear and tear, to determine the most suitable material for your pipes.

C. Real-Life Testimonials: Users’ Experiences with Different Pipewrap Types

Real-life testimonials provide invaluable insights into the practical aspects of pipewrap materials. Users’ experiences reveal the ease of installation, long-term durability, and ability to withstand varying conditions.

Sarah, a homeowner from New York, shares, “We opted for foam pipewrap, and it made a significant difference in our utility bills. The insulation was easy to install, and even in the freezing winter, our pipes remained warm, preventing any potential issues.”

John, a facilities manager, adds, “In our industrial setting, we found rubber pipewrap to be a lifesaver. Its flexibility allowed us to cover even the most complex pipes, ensuring long-lasting protection against moisture and wear.”

Why Pipe Protection is Crucial: Safeguarding the Lifelines of Your Home

Pipes, the silent heroes of our homes, play a crucial role in our daily lives, ensuring the smooth flow of water, gas, and other essentials. However, these vital conduits often operate unnoticed until a problem arises. Protecting them is not just a matter of convenience; it’s a necessity. The reasons why pipe protection is absolutely crucial, exploring common threats that pipes face and the dire consequences of neglecting their maintenance.

A. Common Threats to Pipes: Corrosion, Physical Damage, and Temperature Fluctuations

1. Corrosion:

Pipes are vulnerable to corrosion, especially in regions with hard water. Over time, this natural process weakens the pipes, leading to leaks and reduced efficiency.

2. Physical Damage:

Whether due to accidental impacts during construction or natural disasters, physical damage can compromise the structural integrity of pipes, making them prone to sudden failures.

3. Temperature Fluctuations:

Extreme temperatures can cause pipes to expand and contract, stressing their materials. This strain can weaken joints and connections, increasing the risk of leaks.

B. Consequences of Neglect: Repair Costs, Water Wastage, and Safety Hazards

1. Repair Costs:

Neglected pipes are a disaster waiting to happen. The longer the issues persist, the more extensive the damage becomes, leading to costly repairs. Timely protection can prevent these expenses.

2. Water Wastage:

Leaking pipes waste an enormous amount of water. In a world facing water scarcity, these precious resources should not be squandered. Protecting pipes prevents unnecessary wastage.

3. Safety Hazards:

Damaged pipes can lead to a variety of safety hazards, including water damage to your property’s structure, electrical issues, and even the growth of hazardous molds. These dangers can be avoided through proactive pipe protection measures.

Environmental Considerations: Eco-Friendly wrap for pipes Solutions

In the realm of environmental considerations and eco-friendly pipe protection solutions, Brodi Pipewrap stands out with its innovative spray-on anti-sweat insulating coating. Designed to address the challenges posed by intricate plumbing installations, this advanced solution goes beyond conventional methods. 

Pipewrap

By preventing condensation buildup, Brodi Pipewrap not only ensures the integrity of the pipes but also contributes significantly to environmental conservation. The spray-on application not only covers even the most complex pipe configurations effectively but also minimizes material wastage, aligning with sustainable practices. In an era where environmental consciousness is paramount, Brodi Pipewrap’s eco-friendly approach not only ensures the durability of plumbing systems but also reflects a commitment to reducing the overall environmental impact of pipe protection methods.

Conclusion

In conclusion, pipewrap is a cost-effective and practical solution for protecting your pipes from various threats. Whether you are a homeowner, a business owner, or an industrial manager, investing in high-quality pipewrap can safeguard your infrastructure, enhance efficiency, and save you money in the long run. By understanding the types of pipewrap available, the installation process, and the benefits it offers, you can make an informed decision to ensure the longevity and functionality of your pipes. Don’t wait for a pipe disaster to strike; take proactive measures today and wrap your pipes for a secure and worry-free future.

Addressing Mold and Potential Health Issues with AC Gel Pucks: An Effective Solution

The outdoor AC unit compressor is installed outside the building.

Mold growth in air conditioning systems can lead to a range of health issues and affect the overall indoor air quality. It’s crucial to address this problem effectively to ensure a clean and healthy environment. In this blog, we will explore a product called AC Gel Pucks, specifically designed to tackle mold and prevent potential health risks associated with it. Let’s dive in and discover how these condensate pan cleaning tablets can provide a practical solution.

Understanding the Problem:

Mold thrives in warm and humid environments, making air conditioning systems an ideal breeding ground. As condensation occurs within the system, it accumulates in the condensate pan. Over time, this moisture creates a perfect habitat for mold growth. When left unattended, the mold can spread throughout the system, leading to air contamination and health issues such as allergies, respiratory problems, and even infections.

Introducing AC Gel Pucks

AC Gel Pucks, offered by Brodi, are specifically formulated tablets designed to combat mold growth in air conditioning systems. These tablets are placed in the condensate pan, where they dissolve slowly, releasing an effective cleaning gel. The gel’s unique properties inhibit mold growth, break down organic matter, and prevent clogs, ensuring a cleaner and healthier system.

Benefits of AC Gel Pucks:

Mold Prevention 

The primary purpose of AC Gel Pucks is to prevent mold growth in the condensate pan. By inhibiting the growth of mold, these tablets address a significant cause of indoor air pollution, promoting a healthier living environment.

Improved Indoor Air Quality

By eliminating mold and organic matter, AC Gel Pucks contribute to improved indoor air quality. Cleaner air reduces the risk of respiratory issues, allergies, and other health concerns associated with poor air quality.

Easy to Use 

AC Gel Pucks are designed for easy and hassle-free application. Simply place the tablets in the condensate pan, and they will slowly dissolve over time, continuously providing their cleaning and mold prevention benefits.

Long-Lasting Effects 

With a slow-dissolving formula, AC Gel Pucks offer long-lasting effects, providing ongoing protection against mold growth. Regular use of these tablets ensures that your air conditioning system remains clean and mold-free.

Cost-Effective Solution

Investing in AC Gel Pucks can save you money in the long run. By preventing mold growth and maintaining a cleaner system, you reduce the risk of costly repairs, maintenance, and potential health-related expenses.

Conclusion

Maintaining a clean and mold-free air conditioning system is essential for both the longevity of the system and the health of its occupants. AC Gel Pucks offer a practical and effective solution to combat mold growth and prevent associated health issues. By using these condensate pan cleaning tablets, you can enjoy improved indoor air quality, peace of mind, and a healthier living environment. Consider incorporating AC Gel Pucks into your regular air conditioning maintenance routine and reap the benefits of a cleaner, mold-free system.

A Step-by-Step Guide to Unclogging Your AC Condensate Drain Line

many-condensing-units-of-air-conditioners

With the summer heat blazing outside, your AC unit, including the condensing unit, condensing coil, and condensing fan motor, becomes your best friend in keeping your indoor space cool and comfortable. However, an often-overlooked maintenance task is ensuring that your AC condensate drain line, pipe, tray, and even the unit’s condensate pump remain clear of any clogs. A clogged condensate drain line can cause water leakage, reduced cooling efficiency, and potential damage to your system. Fortunately, unclogging the drain line is a relatively simple task that can be done with a few basic tools and a little patience. In this blog, we’ll walk you through a step-by-step guide on how to unclog a clogged AC condensate drain line and maintain a properly functioning AC unit.

Step 1: Turn Off the Power:

Before you begin any work on your air conditioning system, it’s crucial to ensure your safety. Locate your AC unit’s circuit breaker and switch off the power supply to the condensing unit and its components. This will prevent any accidental electrical shocks while working on the condensate drain line.

Step 2: Locate the AC Condensate Drain Line, Pipe, and Tray:

The AC condensate drain line is usually a PVC pipe located near the indoor air handling unit or the furnace. It is typically white or gray in color and has a T-shaped fitting with a capped end. Additionally, locate the AC condensate pipe and tray, which may be connected to the condensing unit. Familiarize yourself with these components before proceeding.

Step 3: Inspect for Clogs:

Using a flashlight, inspect the AC condensate drain line, pipe, and tray for any visible clogs. Look for accumulated debris, such as dust, dirt, algae, or mold. These can often be seen near the openings of the drain line, pipe, or inside the tray. If you can see a blockage, proceed to the next step.

Step 4: Clear the Clog in the AC Condensate Drain Line:

To clear the clog in the AC condensate drain line, you can use one of the following methods:

a. Using a Wet/Dry Vacuum: Attach the vacuum to the end of the drain line or directly over the opening. Create a tight seal around the opening to maximize suction power. Turn on the vacuum and allow it to draw out the clog and any trapped water. Repeat the process several times until the line is clear.

b. Flushing with Water: If you don’t have a wet/dry vacuum, you can try flushing the drain line with water. Use a funnel or a small container to pour a mixture of equal parts white vinegar and water into the drain line. The vinegar helps dissolve the clog and inhibits future algae growth. Let the mixture sit in the line for about 30 minutes. Next, flush the line with clean water to remove the dissolved debris. Repeat this process if necessary.

Step 5: Clean the AC Condensate Tray and Components:

While the clog is removed, take the opportunity to clean the AC condensate tray and other components. Use a mixture of mild detergent and warm water to scrub away any accumulated dirt or grime. Rinse the tray thoroughly and dry it before reassembling.

Step 6: Check the AC Condensate Pump (if applicable):

If your AC unit has a condensate pump, inspect it for any clogs or malfunctions. Refer to the manufacturer’s instructions on how to maintain and troubleshoot the pump. Clean or repair as necessary to ensure proper functioning.

Step 7: Reassemble and Test:

Once the AC condensate drain line is clear, the tray is clean, and any issues with the condensate pump are resolved, reassemble the components. Replace the cap on the drain line and ensure it is secured tightly. Restore power to your AC unit and let it run for a while. Check for any leaks around the drain line or the condensing unit. If everything looks good, congratulations! You’ve successfully unclogged your AC condensate drain line and ensured the smooth operation of your AC unit.

Preventative Maintenance Tips:

To minimize the risk of future clogs in the AC condensate drain line and related components, consider the following preventative measures:

Regularly inspect and clean your air filters to prevent dust and debris buildup. Keep the area around the condensate drain line, pipe, tray, and condensing unit clear of any obstructions.

Use a condensate drain line cleaning solution periodically to inhibit algae and mold growth.

Schedule annual professional maintenance for your AC unit, including a thorough inspection of the condensing unit and its components.

To really take care of the situation, try out Brodi’s AC Gel Pucks for maximum treatment. Our industrial grade product prevents slime, sludge and fungus accumulation which can lead to bacteria growth, potentially causing infections.

By following these steps and practicing preventative maintenance, you can keep your AC unit and its condensate system running smoothly throughout the summer months, ensuring optimal cooling efficiency and avoiding potential issues down the road.

Get to the Root Cause of Stained Ceiling Tiles with these 7 Maintenance Tips

Renew-Stained Ceiling Tiles-Small

Water stains on ceilings and discolored acoustical ceiling tiles are often indicative of underlying HVAC issues. While treating the symptoms may provide temporary relief, it is essential to fix the root cause of the problem for a long-term solution. Brodi’s HVAC Starter Pack offers a comprehensive set of resources, equipment, and guidance to help you identify and address the root cause of water stains and prevent further damage.

By following the steps outlined here, which include identifying the source of the problem, repairing or replacing faulty equipment, implementing proper maintenance practices, and utilizing advanced leak detection and prevention tools, you can effectively tackle water-related issues in your facility.

Don’t let water stains on your ceilings be a persistent headache. Embrace Brodi’s HVAC solutions and take control of your facility’s environment. With their expertise and comprehensive offerings, you can fix the root cause of the problem and enjoy a well-maintained and water-stain-free facility.

Fix the root cause of the issue,
rather than just treat the symptoms.

Brodi offers some unique and easy-to-use HVAC solutions to tackle the root of these issues. Check our HVAC Starter Pack, it comes with everything you need to keep your facility running smoothly.


Step 1 – Eliminate sludge buildup in AC condensate pans

AC Gel Pucks (3 oz size) Prevent the buildup of slime, sludge and fungus in your air conditioning unit’s drain line. The pucks dissolve slowly releasing a cleaning agent that removes debris and prevents clogs, maintaining the unit’s efficiency. Prevent system shutdowns, condensation leaks and water damage.


Mini AC Gel Tabs

Mini AC Gel Pucks

These economical-sized 1 oz tabs are great for heat pumps or smaller units.

Step 2 – Unblock your condensate pan drain lines.

MircroFlo, the only product on the market specifically designed to clean condensate drains. It utilizes the water in the drain as a hydraulic ram and doesn’t rely on air pressure or chemicals, providing instant drain opening. Portable and easy to use. For 3/8″ to 7/8″ drains. Focuses on the blockage and won’t shoot up vent pipes. Safe to use, contains no CFCs, acids, or caustics.


Step 3 – Seal any leaks in your condensate pans

Fix A Leak quickly fix leaks with this durable rubberized coating spray. Creates a waterproof, flexible, permanent rubber coating. Can be applied to any surface. Stops leaks and prevents rust and corrosion. Fast drying and will not crack or peel. Use on HVAC condensate pans, PVC drains, gutters, ducting, roofs, flashing, sheds and cement cracks


Step 4 – Fix any cracks on your condensate pans or pipes

Brofix is specially designed to bond to and imitate the properties of copper pipes. Hardens in 5 to 10 minutes and can be tapped, screwed, drilled, sanded, sawed, filed or painted. Permanently repair your cracked copper pipes quickly. 


Step 5 – Stop your pipes from sweating.

Pipewrap – Keep pipes from sweating with our spray-on insulating coating. It dries to a clean, flexible, white finish and adheres to various pipe materials, including stainless steel and PVC. You can use it on cold water pipes, refrigeration lines, valves, and more. The water-resistant coating prevents damage caused by dripping water, making it a must-have for any building. Great for preventing stained ceiling tiles.


Step 6 – Clean your AC and Heat Exchange coils.

Coilean – Say goodbye to harsh vapors and hello to a fresh natural scent as you clean your coils with this water-based foaming spray. Bio-enzymatic action tackles mold and fungus for a deep clean. You can either rinse it off with water or let it be for a hands-free clean. The normal condensation will then rinse away the foam, taking grime and build-up with it!Coilean – Say goodbye to harsh vapors and hello to a fresh natural scent as you clean your coils with this water-based foaming spray. Bio-enzymatic action tackles mold and fungus for a deep clean. You can either rinse it off with water or let it be for a hands-free clean. The normal condensation will then rinse away the foam, taking grime and build-up with it!


Step 7 – Repair your acoustical ceiling tiles.

Renew – Don’t ever use paint to try to get rid of those unsightly stains on your ceiling tiles! Why can’t I use my trusty can of white spray paint instead? Because paint is flammable and also fills in those little holes in the tiles that make them acoustically sound in the first place. This durable white spray-on coating covers unsightly ceiling tile stains caused by water damage, smoke and soil discoloration.


Introducing the Brodi
HVAC Starter Pack

All the products you need to keep your HVAC systems in top condition

How to protect surfaces from salt water corrosion after the ice melts

excessive salt after snow and ice melting

Winter weather is harsh, but it’s not just the cold that you need to look out for. With the onslaught of snow and ice also comes other dangers that can remain even after the ice has melted away. If you’re a homeowner or a business owner, then protecting your property is likely a top priority. Unfortunately, winter can cause serious damage to some of your most expensive possessions including your vehicles or home.

However, by adopting a solid plan for protecting your home, vehicles and business equipment in the winter, you can save yourself the need for many costly repairs. In this article, we’ll be talking about ways that you can stop winter corrosion and other damage in its tracks.

Continue reading How to protect surfaces from salt water corrosion after the ice melts

Removing hard packed snow and ice with a cost effective liquid de-icer

Snow and ice builds up on entrance, sidewalks and driveways around buildings

Winter can be a magical time. Children playing in the snow, families reuniting over the holidays, friends gathering around cozy fireplaces. Of course, along with the colder temperatures comes the sometimes perilous and unpredictable winter weather and piles of snow and ice that never seem to disappear.

If you own a residential property or manage a commercial property, you know how important and difficult it is to keep walkways, entranceways, driveways and sidewalks clear and safe in these conditions. With so many options for granular and liquid de-icers on the market, what’s the best way to remove hard-packed snow and ice?

Continue reading Removing hard packed snow and ice with a cost effective liquid de-icer